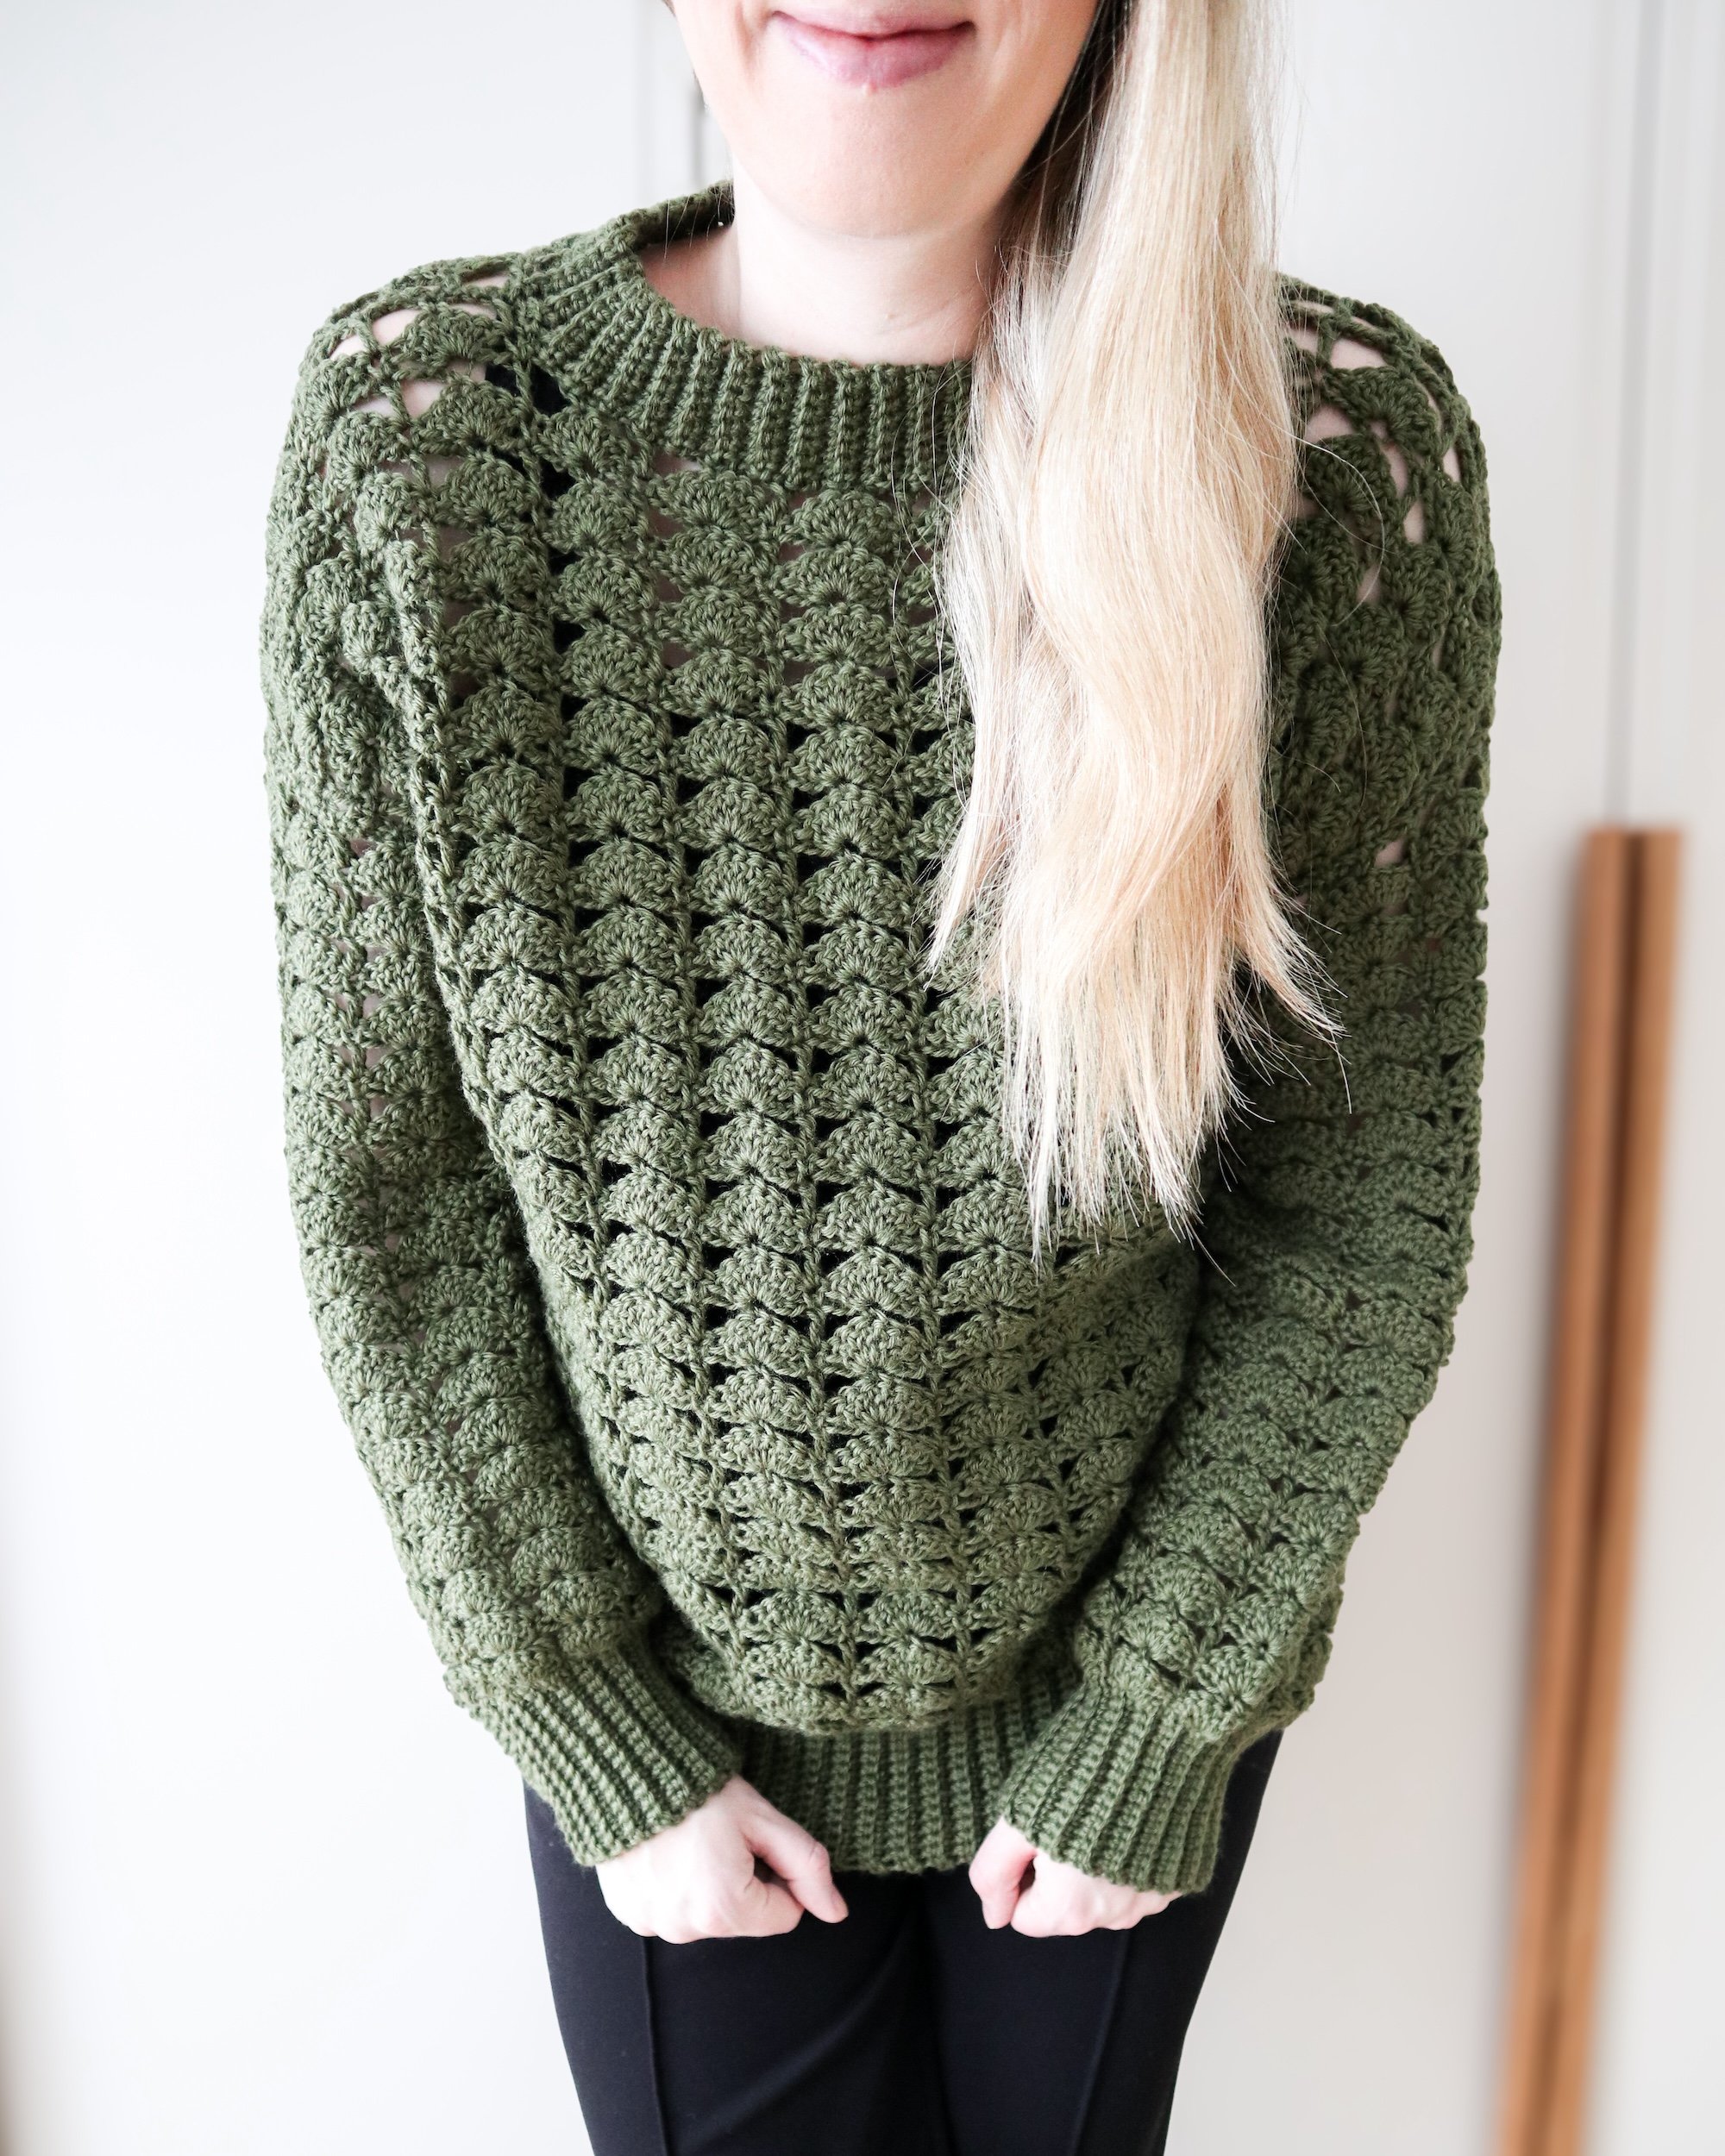
Free Vest Crochet Pattern - Frills Vest
I’ve wanted to design more crochet vests for quite a while but the list of design ideas is so long and I typically make the project I feel most motivated to make at the moment. Now it was finally time for a vest again! My previous one I designed back in 2020 - the Toffee Shop Vest. It is still one of my personal favorites with it’s v-neck and nice granite stitch. This time I wanted to create a vest with nice frills for the arm openings. I went a bit back and forth on the main stitch but then decided to keep it plain and let the frills be the main feature. I also made another version with plain ribbing on the arm openings if that is your preference - or why not make both! This pattern also comes with a full video tutorial. I am so excited to be able to share this pattern with you - I hope you’ll enjoy it! The pattern is an easy pattern written in sizes XS - 5XL. You find the free pattern later in this blog post or get your ad-free printable inexpensive pdf version here.

Materials

Frills version: Divina from Hobbii yarns (65% Alpaca, 25% Polyamide, 10% Wool. 164 yds (150 m) per 50g-skein)
Grey sample: Nuovo Irlanda from Lana Gatto (50% Merino Wool, 50% Acrylic. 123 yds (113 m) per 50g-skein)
or other Aran / Worsted / 4-weight yarn as long as you meet gauge.
Yarn usage (for m / yds see next page): 5 (5, 6, 6, 7) (7, 8, 8, 9) skeins of Divina. Sample made in color 9.
Crochet hook size: US H-8 (5 mm)
Tapestry needle to weave ends
Stitch markers or similar
Measuring Tape
Scissors
About
The Frills Vest is worked in one body piece in the round. After reaching over halfway, the body piece will be split into two; a front and a back. The front and back are worked flat in rows and will also be split for shoulders. We will then sew the shoulders, add a neckline ribbing and either frills or ribbing for the armhole.
The inexpensive printable pdf pattern includes detailed pictures and size chart and if you are all about visual learning you find the full video tutorial on my youtube channel or below.
This pattern is written using US terminology.
Stitch count is mentioned for the first row and then if it changes.
Use the hook size you met gauge with.
Turning chains do not count as stitches, if not mentioned that they do.
Gauge (4x4” / 10x10 cm): 12 hdc-BLO x 12 rows, blocked.
Abbreviations
ch - Chain
st(s) - Stitch(es)
hdc - Half double crochet
sc - Single crochet
sc-BLO- Single crochet back loop only
hdc2tog - Half double crochet two together
sl st - Slip stitch
in ss - In the same stitch
sm - Stitch marker
sl st - Slip stitch
rs - Right side
Sizes
Note! The measurements below are the measurements of the final garment size (after blocking).

Size modifications
This vest is designed with wide armholes so that you’ll be able to fit a sweater or a shirt underneath. It is also designed to be short so that the sweater or skirt (or dress) you have underneath shows. But both of these can be adjusted if you prefer so.
Armholes: if you wish to have smaller armholes and wider shoulders the you make more stitches for your front and back. That means that when it is time to split for the front and back you make fewer slip stitches. If you still want the shoulders to be as narrow as the sample but want smaller armholes, then you make fewer rows for the front and back. If you still want to keep the length, then make more rows before splitting for the front and back.
Length: for a longer vest; make more rows before splitting for the front and back. For a shorter vest; make fewer rows before splitting for the front and back.
The Pattern
For detailed pictures grab the inexpensive printable pdf or watch the full video tutorial on Youtube.
St count is mentioned for the first row and then if it changes. Use the hook size you met gauge with. Turning chains do not count as stitches.
Checking your gauge
We make the gauge swatch wider to avoid measuring the edges.
Ch 18.
Row 1: In the 3rd back bump from the hook, hdc. Hdc in every ch across. Ch 1. Turn. (16 sts)
Row 2: Hdc in every st across. Ch 1. Turn.
Repeat row 2 until you’ve made a total of 12 rows.
Measure your swatch and adjust hook size accordingly.
Gauge: 12 hdc x12 rows.
Body
We will begin with the ribbing.
Leave a tail of at least 6” (15 cm) and then ch 9.
Alternatively make 8 foundation sc and skip row 1.
Row 1: In the back bump of the 2nd ch from the hook, sc. Sc in every ch across. Ch 1. Turn. (8 sts)
Row 2: Sc-BLO in every st across. Ch 1. Turn.
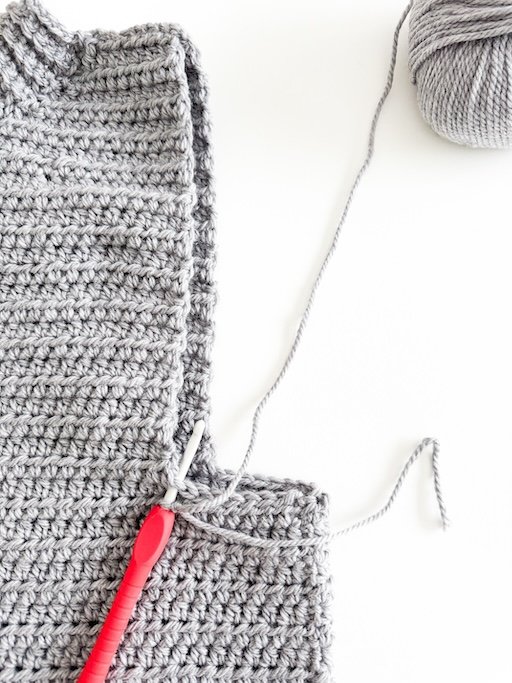
Repeat row 2 until you’ve made a total of 102 (114, 126, 138, 150) (162, 174, 186, 198) rows. Do not fasten off (leave a sm in the working yarn). Sew the short sides of the ribbing using the tails you left in the beginning (Picture A).
Turn the ribbing to now work lengthwise (Picture B). You will now crochet along the edge by making one hdc in every ribbing row.


Click on images to see full text and details
Full video tutorial of the pattern
Round 1 (ws): Continue from your working yarn. Hdc in every ribbing row across (Picture C). Join to the first hdc of the round with a sl st. Ch 1. Turn. (102 (114, 126, 138, 150) (162, 174, 186, 198) sts)
Round 2 (rs): Hdc in every st around. Join to the first hdc of the round with a sl st. Ch 1. Turn.
Repeat round 2 until you’ve made a total of 33 (33, 35, 33, 31) (31, 31, 31, 33) rounds. Do not fasten off, continue with the front.
If you wish to adjust the length, do so here. Make sure to end on a ws row.


Front
Row 1 (rs): Continue from your working yarn. 6 (8, 8, 8, 10) (10, 11, 11, 11) sl sts, 39 (41, 47, 53, 55) (61, 65, 71, 77) hdc. Ch 1. Turn. (39 (41, 47, 53, 55) (61, 65, 71, 77) sts Note! the sl sts do not count))
Row 2 (ws): Hdc in every st across. Ch 1. Turn. (39 (41, 47, 53, 55) (61, 65, 71, 77) sts)
Beautiful versions by my pattern testers


Repeat row 2 until you’ve made a total of 17 (17, 19, 21, 24) (25, 26, 27, 28) rows for the front. Do not fasten off, continue with the shoulders.
Place a sm in the 14th (15th, 17th, 19th, 20th) (23rd, 24th, 26th, 29th) st from each edge (Picture D).

D. Place a sm in the 14th (15th, 17th, 19th, 20th) (23rd, 24th, 26th, 29th) st from each edge.
Shoulder 1
Row 1: Continue from your working yarn. Hdc until one st before the st with the sm. Hdc2tog (the st before the st with the sm and the st with the sm - see pictures). Ch 1. Turn. (13 (14, 16, 18, 19) (22, 23, 25, 28) sts)


Row 2: Hdc2tog. Hdc in every st across. Ch 1. Turn. (12 (13, 15, 17, 18) (21, 22, 24, 27) sts)
Row 3: Hdc in every st across until 2 final sts. Hdc2tog. Ch 1. Turn. (11 (12, 14, 16, 17) (20, 21, 23, 26) sts)
Row 4: Hdc2tog. Hdc in every st across. Ch 1. Turn. (10 (11, 13, 15, 16) (19, 20, 22, 25) sts)
Row 5: Hdc in every st across until 2 final sts. Hdc2tog. Fasten off, leaving a tail of three times the shoulder width for sewing the shoulders. (9 (10, 12, 14, 15) (18, 19, 21, 24)) sts)


Shoulder 2
Attach your yarn in the st with the second sm with a slip knot. Ch 1.
Row 1: Hdc2tog (the st with the sm and the one after - Picture E). Hdc across row. Ch 1. Turn. (13 (14, 16, 18, 19) (22, 23, 25, 28) sts)

E. Hdc2tog (the st with the sm and the one after).
Row 2: Hdc in every st across until 2 final sts. Hdc2tog. Ch 1. Turn. (12 (13, 15, 17, 18) (21, 22, 24, 27) sts)
Row 3: Hdc2tog. Hdc in every st across. Ch 1. Turn. (11 (12, 14, 16, 17) (20, 21, 23, 26) sts)
Row 4: Hdc in every st across until 2 final sts. Hdc2tog. Ch 1. Turn. (10 (11, 13, 15, 16) (19, 20, 22, 25) sts)
Row 5: Hdc2tog. Hdc in every st across. Fasten off, leaving a tail of three times the shoulder width for sewing the shoulders. (9 (10, 12, 14, 15) (18, 19, 21, 24)) sts)
Back
With the rs facing out, attach your yarn 13 (17, 17, 17, 21) (21, 23, 23, 23) sts from the front section (Picture F) with a slip knot. Ch 1.

F. Attach your yarn 13 (17, 17, 17, 21) (21, 23, 23, 23) sts from the front.
Row 1 (rs): Hdc in ss that you attached your yarn. 38 (40, 46, 52, 54) (60, 64, 70, 76) hdc. Ch 1. Turn. (39 (41, 47, 53, 55) (61, 65, 71, 77) sts)

Row 2 (ws): Hdc in every st across. Ch 1. Turn. (39 (41, 47, 53, 55) (61, 65, 71, 77) sts)
Repeat row 2 until you’ve made a total of 20 (20, 22, 24, 27) (28, 29, 30, 31) rows for the back. Do not fasten off, continue with the shoulders.
Place a sm in the 11th (12th, 14th, 16th, 17th) (20th, 21st, 23rd, 26th) st from each edge.
Shoulder 1
Row 1: Continue from your working yarn. Hdc until one st before the st with the sm. Hdc2tog (the st before the st with the sm and the st with the sm). Ch 1. Turn. (10 (11, 13, 15, 16) (19, 20, 22, 25) sts)
Row 2: Hdc2tog. Hdc in every st across. Fasten off. (9 (10, 12, 14, 15) (18, 19, 21, 24) sts)
Shoulder 2
Attach your yarn in the st with the second sm, with a slip knot. Ch 1.
Row 1: Hdc2tog (the st with the sm and the one after). Hdc across row. Ch 1. Turn. (10 (11, 13, 15, 16) (19, 20, 22, 25) sts)
Row 2: Hdc in every st across until 2 final sts. Hdc2tog. Fasten off. (9 (10, 12, 14, 15) (18, 19, 21, 24) sts)
Shoulder seam
Sew the shoulders using the tails you left from the front (Picture G). The whip stitch or mattress stitch works great for sewing.


Neckline
With the rs facing out, attach your yarn in the side seam of the neckline with a slip knot (Picture H), ch 6 (Picture I). Turn.


Row 1: In the 2nd ch from the hook, sc. Sc in the 5 ch across. Attach to the neckline by making a sl st in the next two sts on the neck (Pictures J and K). Ch 1. Turn. (5 sts, the slip sts do not count).


Row 2: Skip the two sl sts and sc-BLO in every st across. Ch 1. Turn. (5 sts)
Row 3: Sc-BLO in every st across, sl st in the next two sts on the neck. Ch 1. Turn.
Repeat rows 2-3 around the neckline. Fasten off, leaving a tail of 10” (15 cm) to sew the short sides of the ribbing.
Sew the short sides of the ribbing (Picture L).

L. Sew the short sides of the ribbing (picture from armhole ribbing but the idea is the same for the neckline)
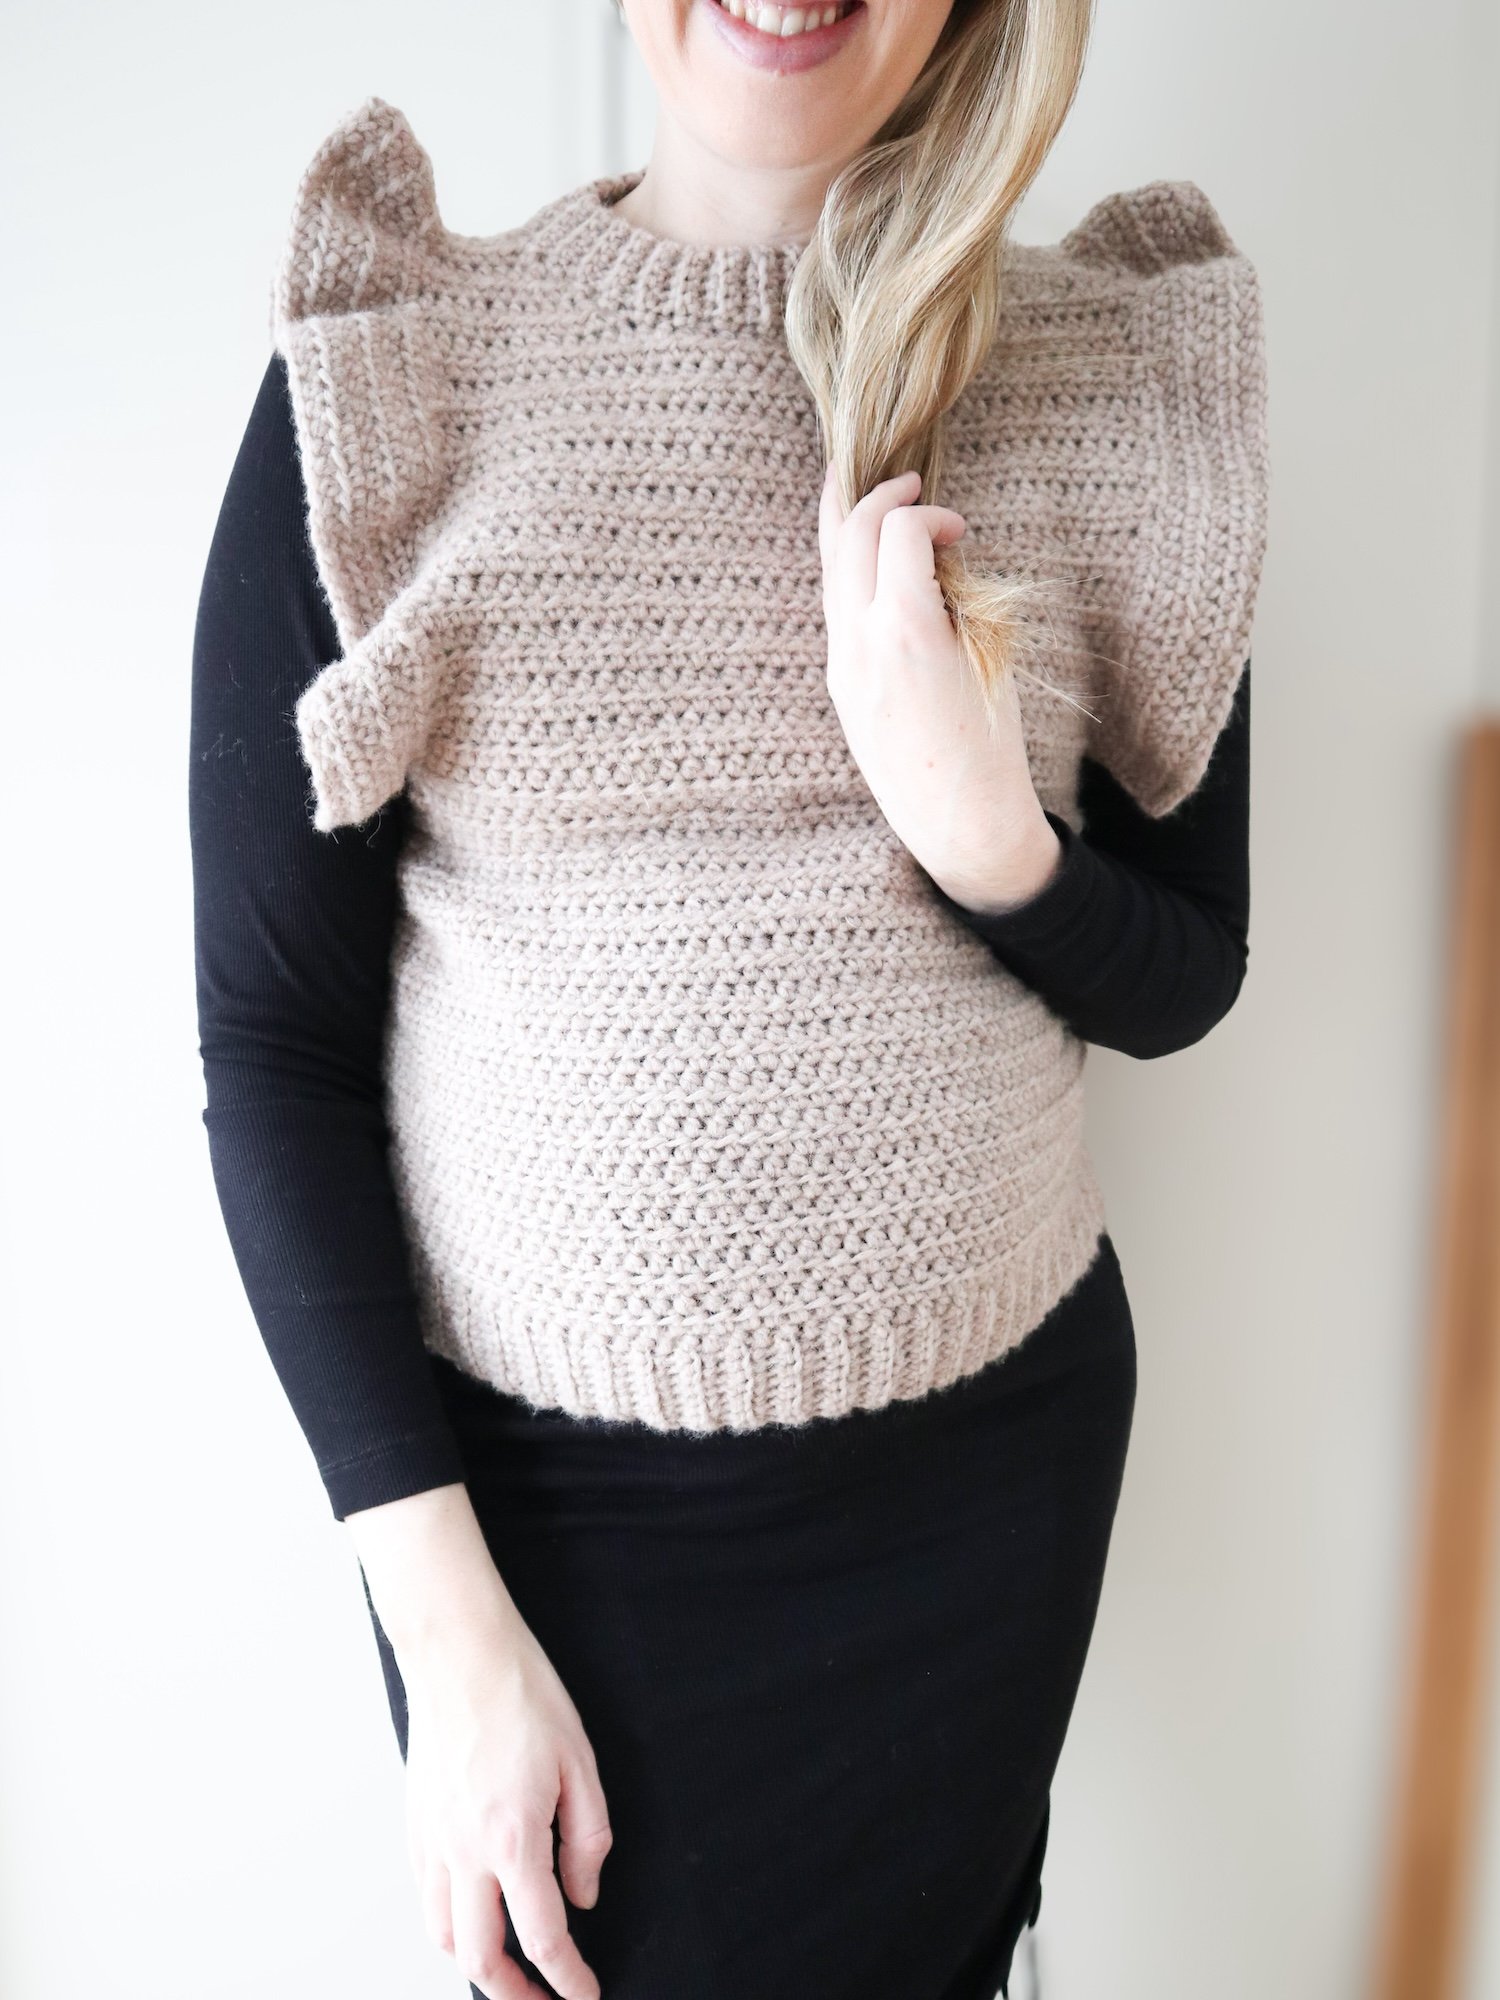
Armhole - Frills or Ribbing
For the armhole you can choose to either have frills or ribbing.
Frills
With the rs facing out, attach your yarn on the side of the armhole with a slip knot (Picture M). Ch 1.
M. With the rs facing out, attach your yarn on the side of the armhole with a slip knot.
Row 1: 2 hdc in every row across the armhole until you reach the side of the armhole on the opposite side (i.e. the same place where you attached your yarn but the opposite side). Ch 1. Turn. (The st count isn’t important here, rather too many sts than to few to make a nice frill, but it should be at least 88 (88, 96, 104, 116) (120, 124, 128, 132) sts)
Row 2: Hdc in every st across until around 10 sts before the shoulder. *2 hdc in ss, hdc* repeat until 10 sts after the shoulder. Hdc in every sts across. (Around +10 sts from row 1 st count, but again not important, rather too many than to few)
Row 3: Hdc in every st across. Ch 1. Turn.
Row 4-6: Repeat row 3. Fasten off.
Repeat for the other armhole.
Ribbing
Made in the same way as the neckline ribbing. With the rs facing out, attach your yarn on bottom of the armhole with a slip knot (Picture N). Ch 6.

N. With the rs facing out, attach your yarn on bottom of the armhole with a slip knot. Ch 6.
Row 1: In the 2nd ch from the hook, sc. Sc in the 5 ch across. Attach to the armhole by making a sl st in the next two sts on the armhole. Ch 1. Turn. (5 sts, the slip sts do not count).
Row 2: Skip the two sl sts and sc-BLO in every st across. Ch 1. Turn. (5 sts)
Row 3: Sc-BLO in every st across, sl st in the next two sts (or rows) on the armhole. Ch 1. Turn.
Repeat row 2-3 around the armhole. Fasten off, leaving a tail of 10” (15 cm) to sew the short sides of the ribbing. Sew the short sides of the ribbing.
Repeat for the other armhole.
Block to correct measurements and weave in ends.
Crochet a cute vest with this crochet pattern. The pattern comes with two options for the arm opening - frills or ribbing. You choose which one you want or why not make both?
This pattern comes in English with US crochet terminology.
It has a full video tutorial on YouTube https://youtu.be/bFVwP_R4kbw
Supplies
Recommended Yarn:
Frills version: Divina from Hobbii yarns (65% Alpaca, 25% Polyamide, 10% Wool. 164 yds (150 m) per 50g-skein)
Grey sample: Nuovo Irlanda from Lana Gatto (50% Merino Wool, 50% Acrylic. 123 yds (113 m) per 50g-skein)
or other Aran / Worsted / 4-weight yarn as long as you meet gauge.
Yarn usage: 5 (5, 6, 6, 7) (7, 8, 8, 9) skeins of Divina. Sample made in color 9.
Crochet hook size: US H-8 (5 mm)
Sizes
This pattern is written in nine sizes: XS (S, M, L, XL) (2X, 3X, 4X, 5X). See pictures for details.
Skill level
Easy
Supplies
Recommended Yarn:
Frills version: Divina from Hobbii yarns (65% Alpaca, 25% Polyamide, 10% Wool. 164 yds (150 m) per 50g-skein)
Grey sample: Nuovo Irlanda from Lana Gatto (50% Merino Wool, 50% Acrylic. 123 yds (113 m) per 50g-skein)
or other Aran / Worsted / 4-weight yarn as long as you meet gauge.
Yarn usage (for m / yds see next page): 5 (5, 6, 6, 7) (7, 8, 8, 9) skeins of Divina. Sample made in color 9.
Crochet hook size: US H-8 (5 mm)
Tapestry needle to weave ends
Stitch markers or similar
Scissors
Measuring tape
COPYRIGHT
The pattern and photographs of this design are the property of Coffee & Crocheting. This pattern and design are subject to copyright, and are for personal, non-commercial use only. You may not distribute or sell this pattern without consent.
Happy Making!
COPYRIGHT
The pattern and photographs of this design are the property of Coffee & Crocheting. This pattern and design are subject to copyright, and are for personal, non-commercial use only. You may not distribute or sell this pattern without consent


Follow on me on Instagram @coffeeandcrocheting