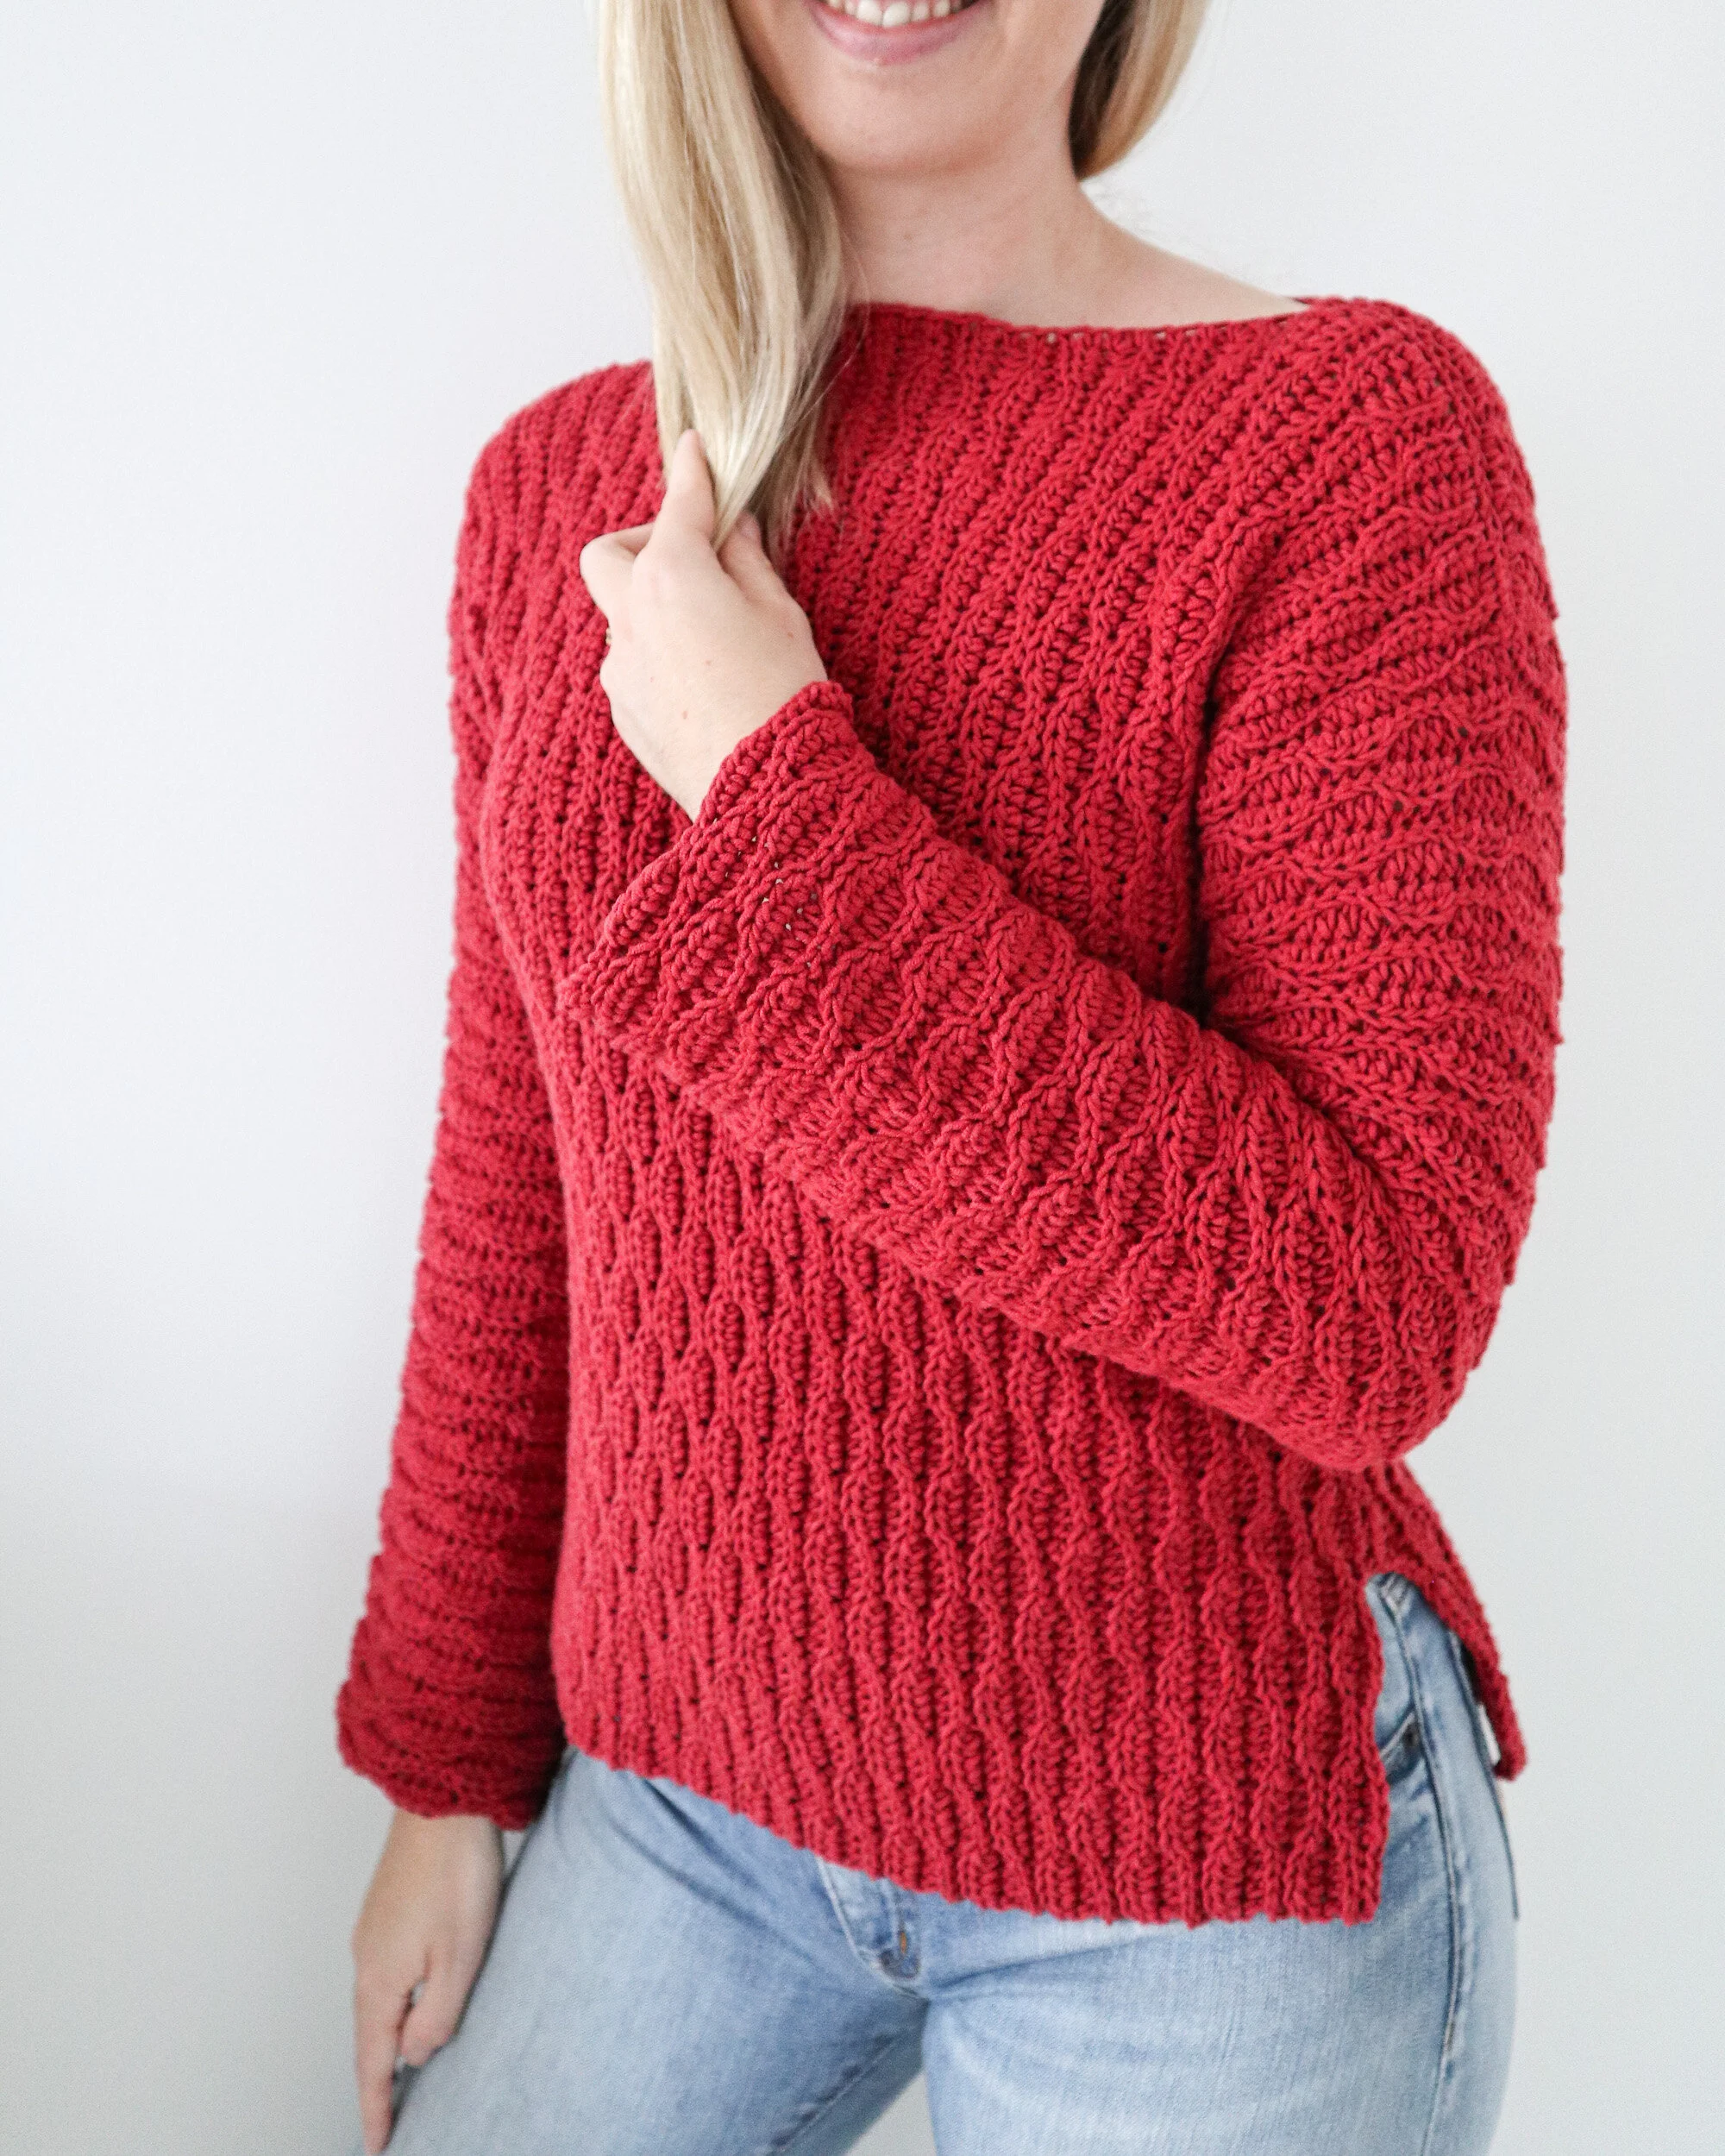
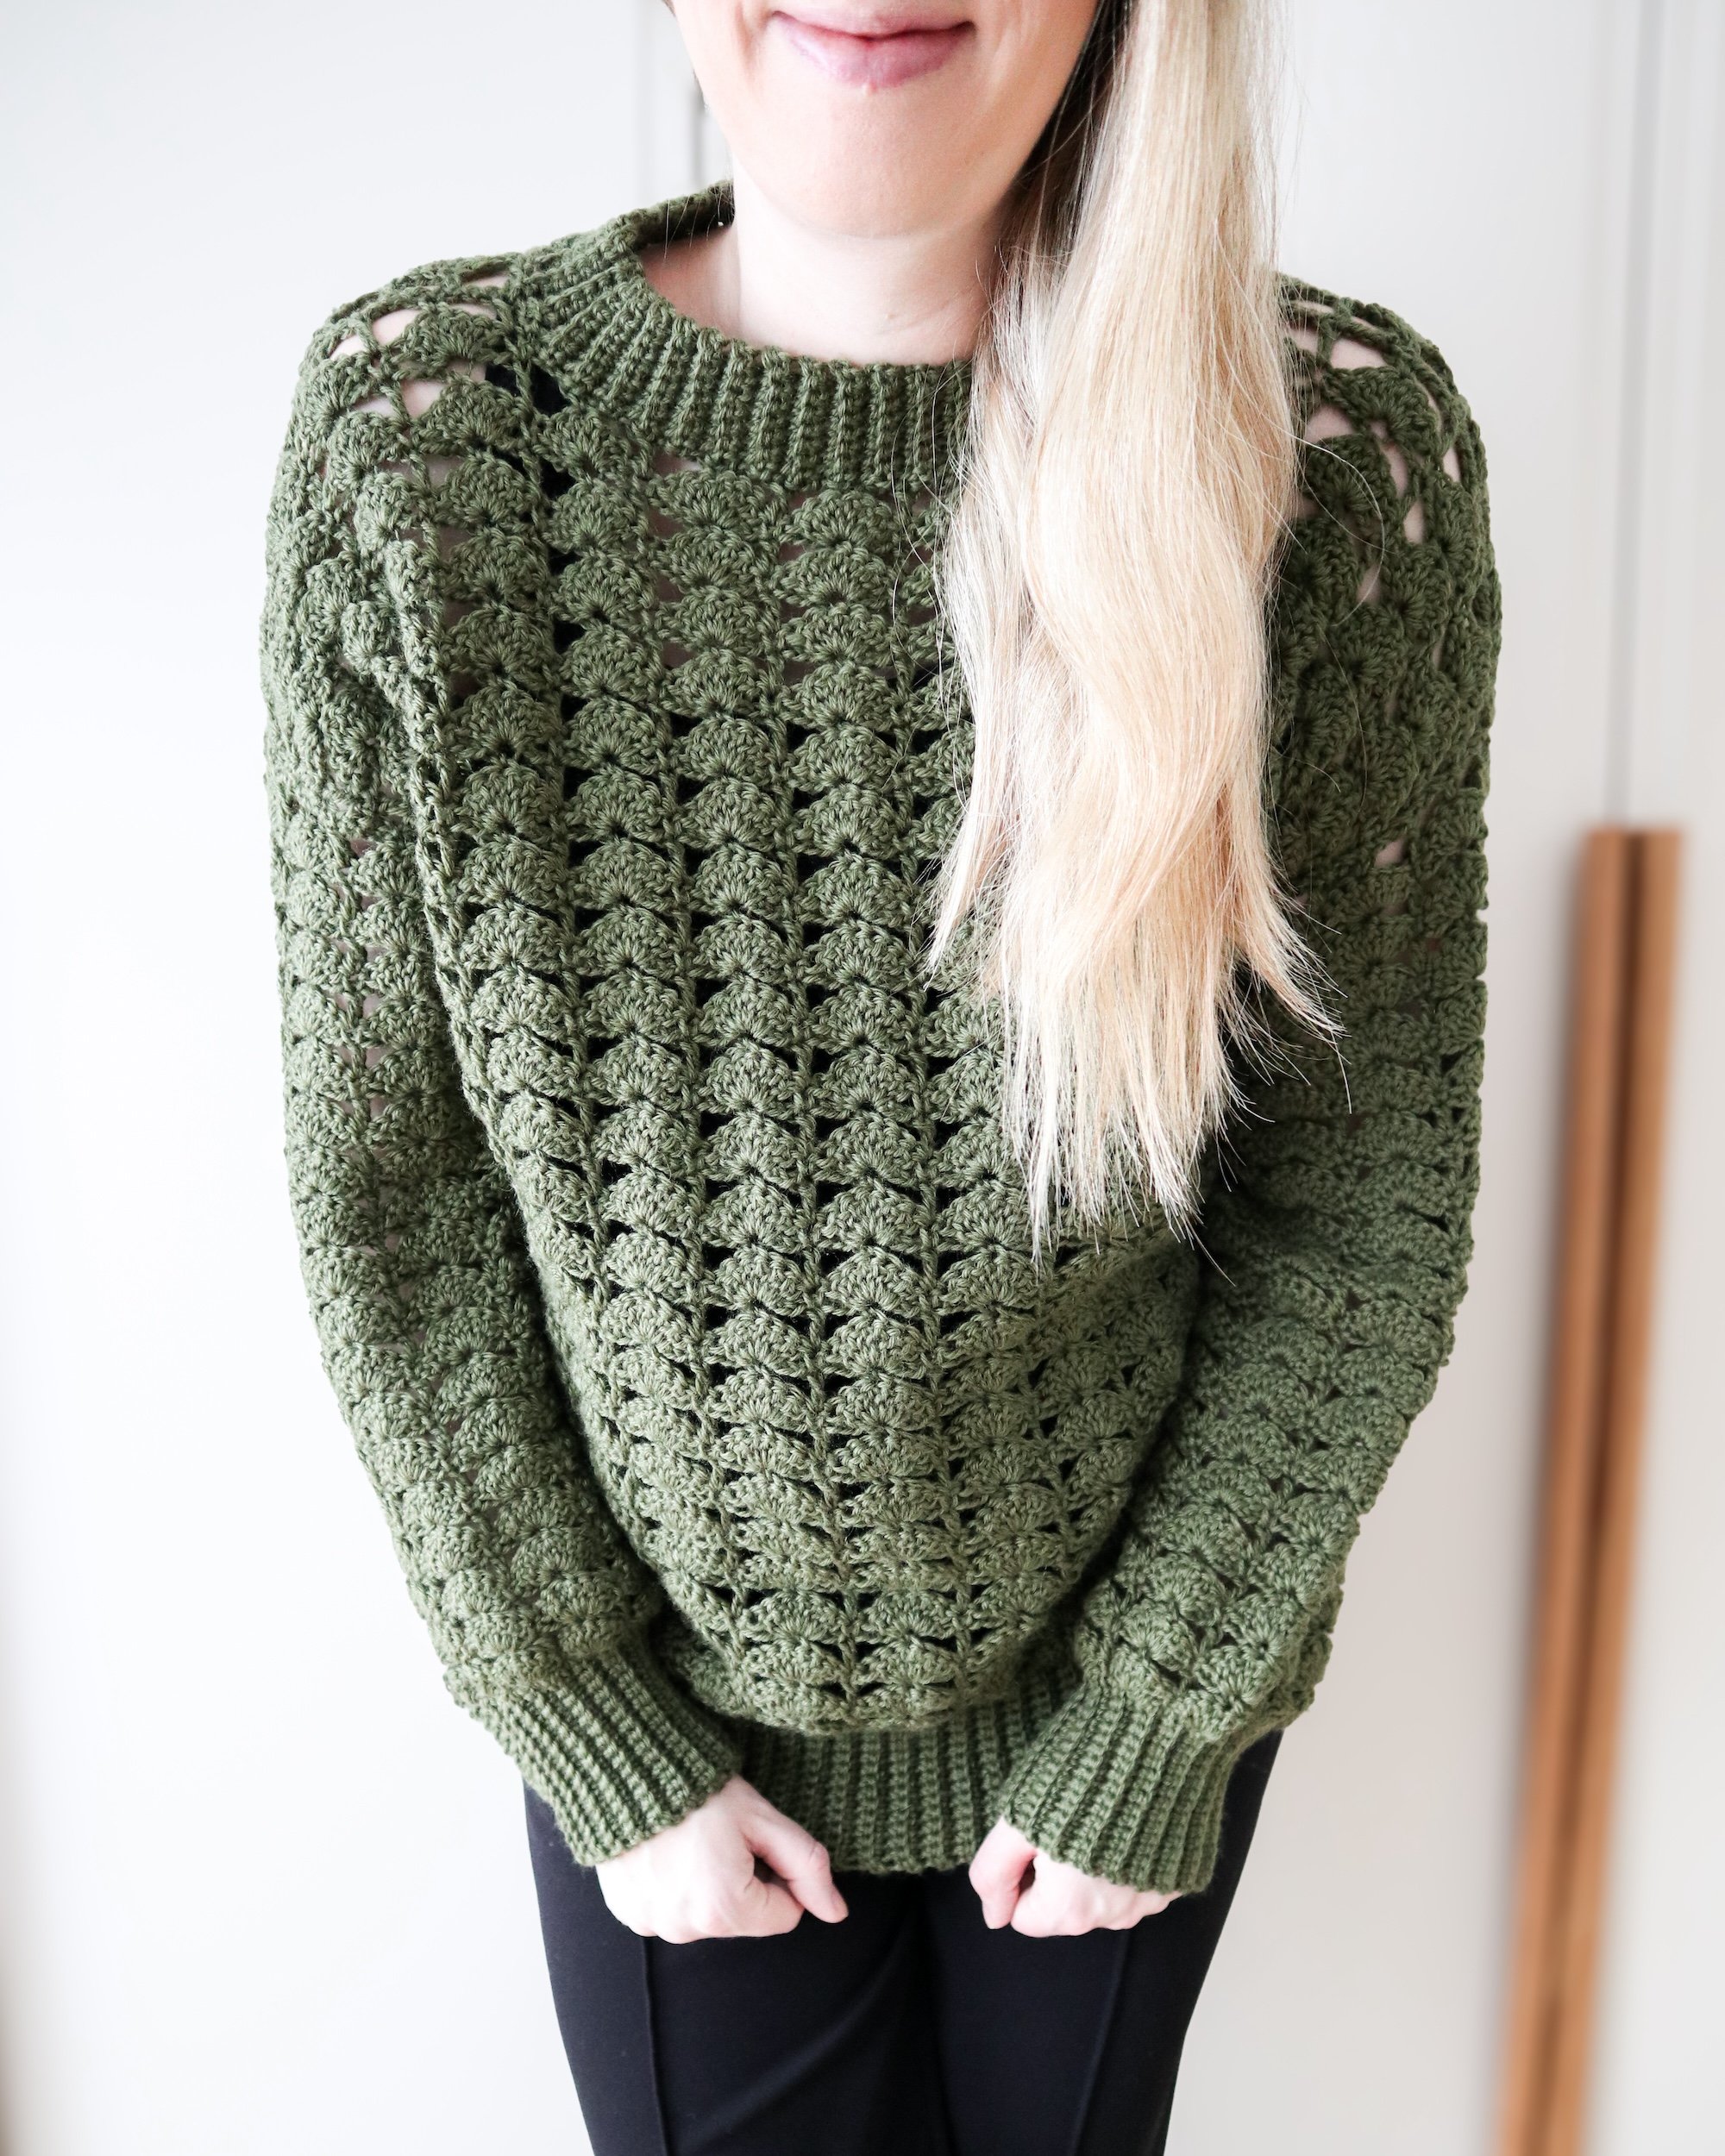
Free Sweater Crochet Pattern - October Sweater
I’ve already taken you through the journey of designing this crochet sweater here. Now it is time to present the actual crochet sweater in more details. In this post you eill find all the details about the sweater as well as the free pattern to create your own sweater. This pattern also comes with a full video tutorial. I am so excited to be able to share this pattern with you - I hope you’ll enjoy it! The pattern is an easy pattern written in sizes XS - 5XL. You find the free pattern later in this blog post or get your ad-free printable inexpensive pdf version here.
Design inspiration
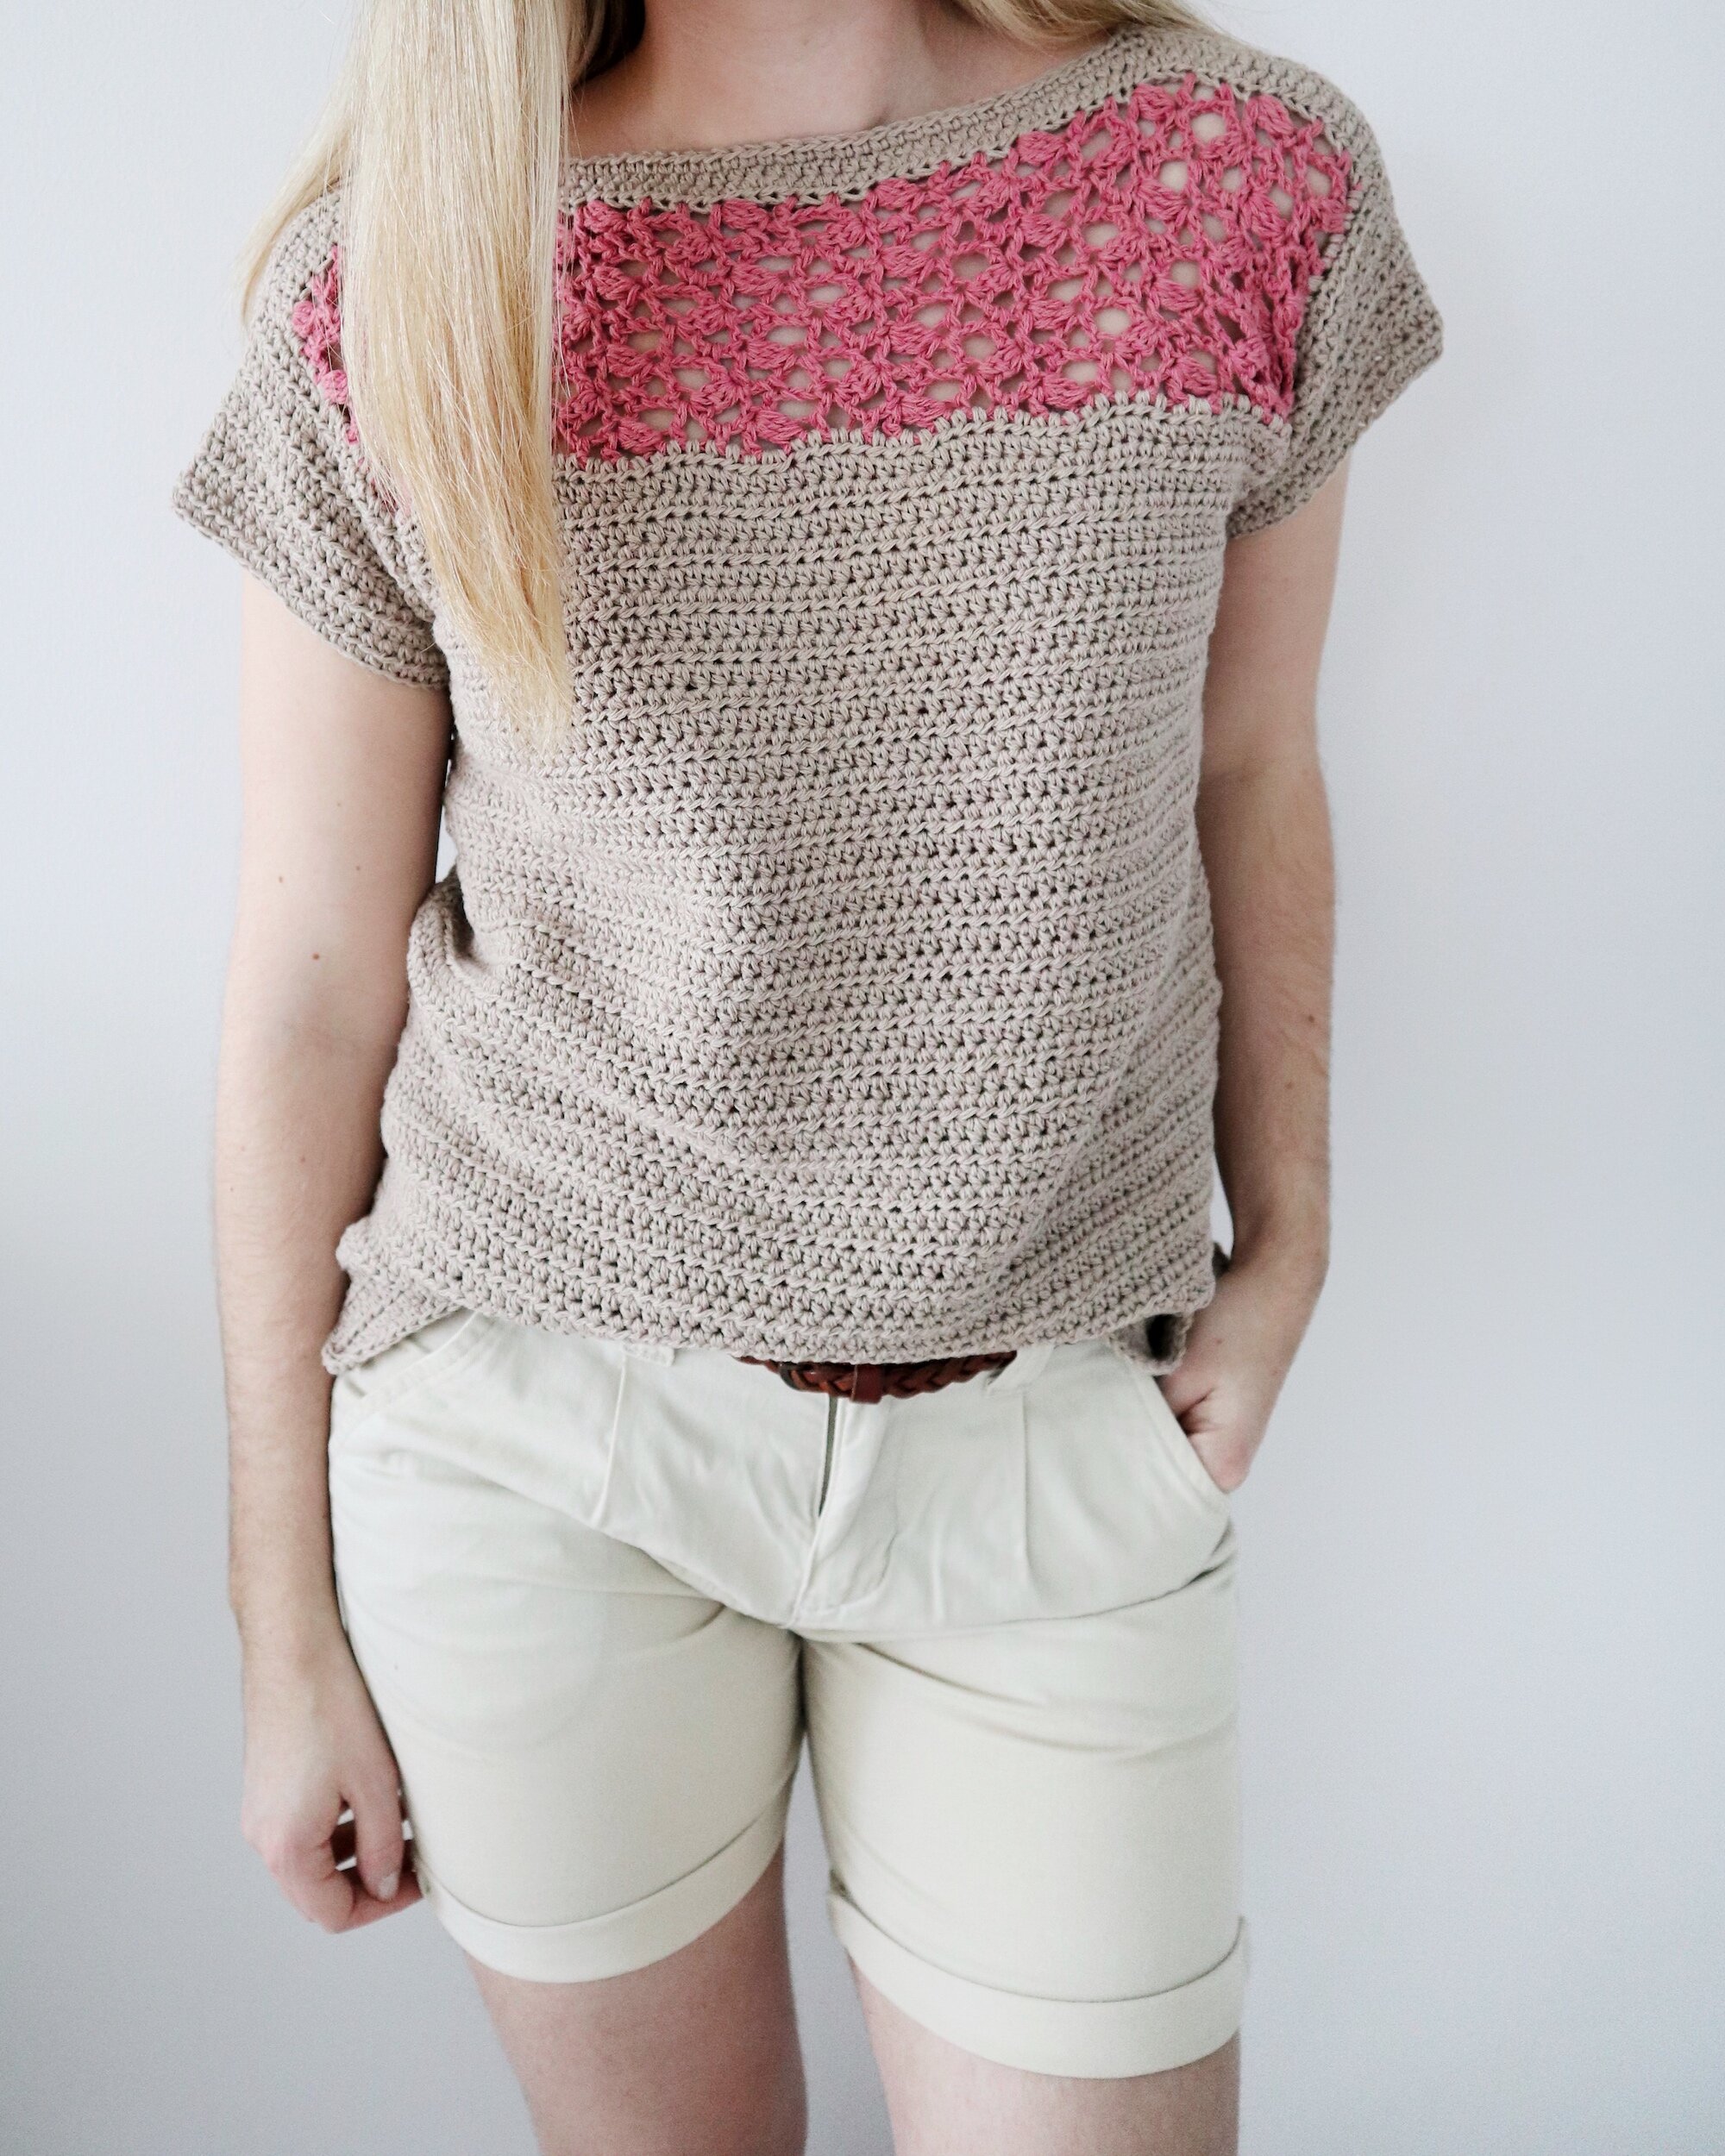
I got a magazine in the mail that my toddler started to read. She accidentally pulled out a page from the magazine and on that page was a beautiful knitted sweater. I knew that I one day wanted to make a crochet version of it. Of course with a bit of changes so it would feel like mine, but keeping the basic idea the same. I saved that page in my notebook until I was ready with all the patterns for my crochet book. When I finally had time to make an “unstructured” project I dug out that picture and got started. The result - the October Sweater!
Materials

Yarn: Diablo Multi from Hobbii Yarn (40% Acrylic, 30% Mohair, 30% Polyamide. 98 yds (90 m) per 50g-skein) or other (heavier) Aran / Worsted / 10 ply / 9 wpi / 4-weight yarn as long as you meet gauge.
Please note! That Diablo Multi is classified as a bulky (5) weight yarn. But comparing the gauge it matches more a heavier aran/worsted weight yarn. But if you want to use a bulky /5 -weight yarn that might work nice as well. You can also use an aran weight yarn + a strand of mohair.
Yarn usage: 8 (9, 10, 10, 11) (12, 13, 14, 15) skeins of Diablo Multi. Sample made in color 20.
Crochet hook size: J-10 / 6 mm
Tapestry needle to weave ends
Stitch markers or similar
Measuring Tape
Scissors
About
The October Sweater is work in one body piece, lengthwise. That means that width will be the length of the sweater and the number of rows will be the width. The body piece is folded in half and sides sewn, then the sleeves are crocheted in the round straight on the body piece.
The inexpensive printable pdf pattern includes detailed pictures and size chart and if you are all about visual learning you find the full video tutorial on my youtube channel or below.
This pattern is written using US terminology.
Turning chains do not count as stitches.
Gauge (4x4” / 10x10 cm): 12 hdc-BLO in 8 rows, blocked.
Abbreviations
ch - Chain
st(s) - Stitch(es)
hdc - Half double crochet
sc - Single crochet
sc-BLO- Single crochet back loop only
hdc-BLO - Half double Crochet back loop only
hdc2tog - Half double crochet two together
sk - Skip
sl st - Slip stitch
yo - Yarn over
sm - Stitch marker
sl st - Slip stitch
sl st BLO - Slip stitch back loop only
rs - Right side
Sizes
Note! The measurements below are the measurements of the final garment size (after blocking).
Size
Bust
To fit bust (4-5” [10-12.5 cm] positive ease)
Length
Armhole
Yarn usage (estimate)
XS
35” (87.5 cm)
30” (75 cm)
22.5” (56 cm)
13.5” (34 cm)
720 yds / 660 m
S
39” (97.5 cm)
34” (85 cm)
23” (58 cm)
14.5” (36 cm)
810 yds / 740 m
M
43” (107.5 cm)
38” (95 cm)
23” (58 cm)
15” (38 cm)
910 yds / 850 m
L
47” (117.5 cm)
42” (105 cm)
24” (60 cm)
16.5” (41 cm)
980 yds / 900 m
XL
51” (127.5 cm)
46” (115 cm)
24.5” (62 cm)
18” (45 cm)
1100 yds / 1000 m
2X
55” (137.5 cm)
50” (125 cm)
25.5” (64 cm)
19” (47 cm)
1200 yds / 1100 m
3X
59” (147.5 cm)
54” (135 cm)
26.5” (66 cm)
19.5” (49 cm)
1300 yds / 1200 m
4X
63” (157.5 cm)
58” (145 cm)
26.5” (66 cm)
20.5” (51 cm)
1370 yds / 1250 m
5X
67” (167.5 cm)
62” (155 cm)
26.5” (66 cm)
21” (52 cm)
1450 yds / 1320 m
Find a easy to read table and graphic in the pdf pattern!
Size modifications
The sweater is worked sideways. So the number of rows will be the width and the number of chains is the length of the sweater when put together.
Width of the sweater: To adjust the width - make more or less rows. You need to adjust so that your total number of rows is an uneven amount of rows.
The opening for the neckline is made on = (total number of rows / 2) +0.5 rows for example size M has a total number of 43 rows. The neckline is made on (43/2)+0.5 rows = 21.5+0.5 rows= 22
Every row is 1/3” (0.8 cm)
Length of the sweater: Make more or less chains in the beginning. You make the total length in one piece i.e. both the front and the back. If you want to add 1” (2.5 cm) in length you need to add 3 more chains on the front AND 3 more on the back i.e. a total of 6 chains.
Neckline: I suggest that if you prefer a wide neckline it is better to add a few stitches on the neck opening, i.e. if you should place you stitch marker on the 50th st, place it on the 47th instead. The neckline you can close later on when making the edging around the neckline by first slip stitch through both of the sides (i.e. place them on top of each other and go through both layers with the hook).
Sleeves: The length you easily adjust by making more or less rows. Try it on to see what you prefer! The width you can adjust by making either another size sleeve than body (i.e. L sleeves for and M sweater) or by adding/removing a few chains in the beginning. You also need to leave that amount of stitches unworked when sewing the sides together. Eg. if you want L size sleeve to the M size sweater mark the stitches accordingly (see section about sewing instructions.)
The Pattern
For detailed pictures grab the inexpensive printable pdf or watch the full video tutorial on Youtube.
St count is mentioned for the first row and then if it changes. Use the hook size you met gauge with. Turning chains do not count as stitches.
If a row number has many numbers - for example 19 (21, 23, 25, 27) (30, 31, 33, 35) is means that it is row number 19 for size XS, 21 for size S, 23 for size M and so on.
Body
Leave a long tail of at least 40” (100 cm) and then ch 135 (140, 140, 145, 150) (155, 159, 159, 159)
Row 1: In the back bump of the 2nd ch from the hook, sc. 7 sc (mark the final sc with a sm) Hdc in every ch (back bump) across until the eight final sts (mark with a sm). 8 sc. Ch 1. Turn. 134 (139, 139, 144, 149) (154, 158, 158, 158) sts
Row 2: 8 sc-BLO, hdc-BLO in every st across until the eight final sts, 8 sc-BLO. Ch 1. Turn.
Row 3: Repeat row 2 until you’ve made a total of 17 (19, 21, 23, 25) (28, 29, 31, 33) rows.
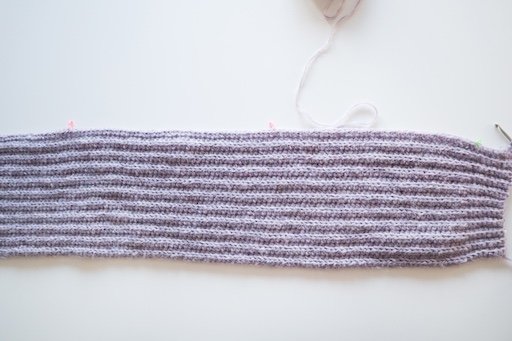
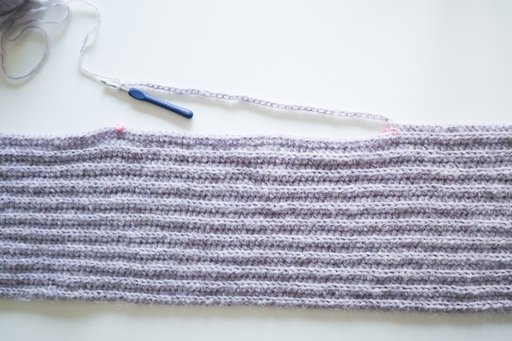
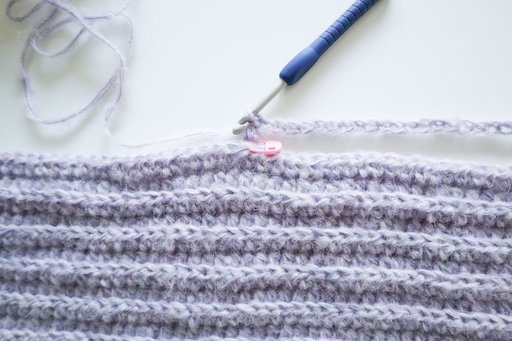
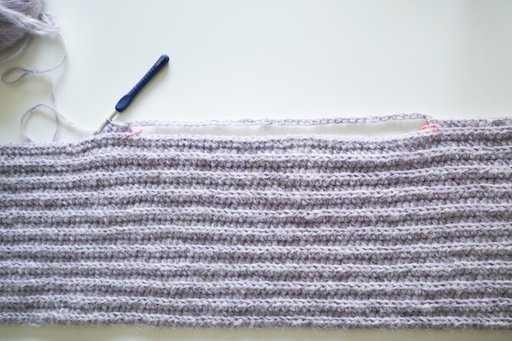
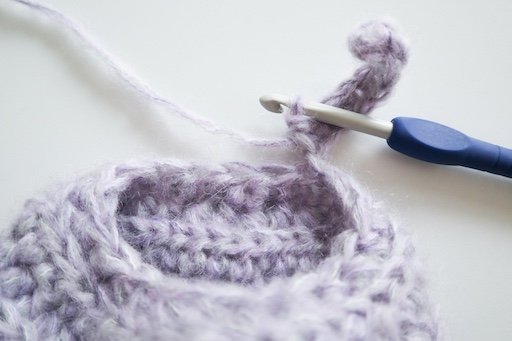
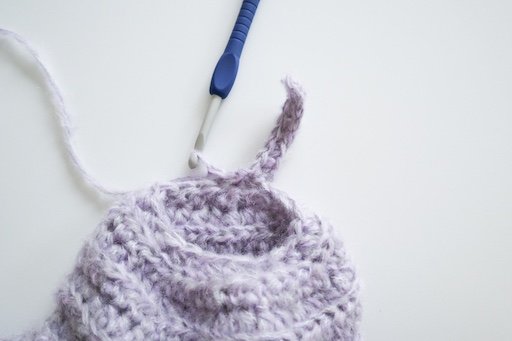
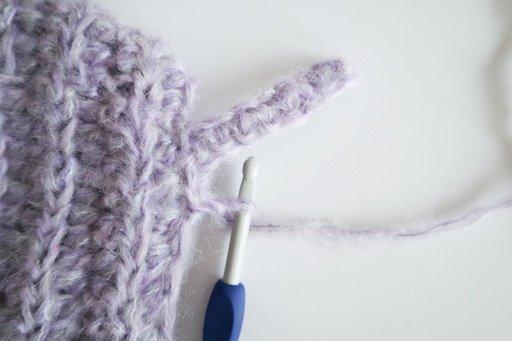
Row 18 (20, 22, 24, 26) (29, 30, 32, 34): Place a sm in the 37 (39, 42, 44, 44) (47, 49, 49, 51)th st from each edge (Picture A). 8 sc-BLO, hdc-BLO until the sm. Hdc-BLO in the st with the sm. Ch 38 (41, 43, 46, 45) (48, 50, 50, 52)*(Picture B). Hdc-BLO in the st with the sm (Picture C). Hdc-BLO across the row (Picture D) until the eight final sts. 8 sc-BLO. Ch 1. Turn.
*you can use a larger hook for the chains if you know you make tight chains.
Full video tutorial of the pattern
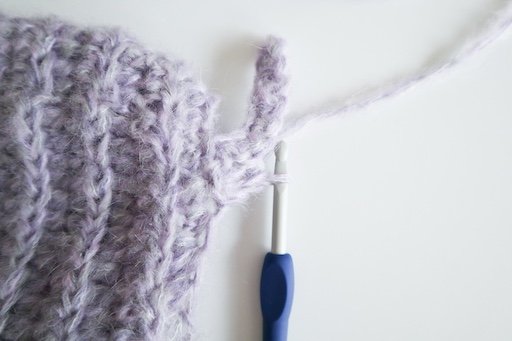
Row 19 (21, 23, 25, 27) (30, 31, 33, 35)**: Repeat row 2 (hdc also in the chs. Picture E) until you’ve made a total of 35 (39, 43, 47, 51) (55, 59, 63, 67) rows. Fasten off, leaving a long tail for sewing the sides.
** I suggest you try on your sweater after a few rows here to see the neckline opening. If it is too tight, then you need to move your sm on row 18 (20, 22, 24, 26) (29, 30, 32, 34) so that you can make more chains (see page 4). A too wide neck opening we can adjust later on, so that is ok.


E. Hdc across the row, also in the chains (back bump).
Sewing the sides
Fold the front over the back (right side facing out) (Picture F). This sweater doesn’t have a specific right side. You choose which one to have out. Use the tails you’ve left for sewing.
Begin with the sides. Place a sm 20 (21, 23, 24, 27) (28, 29, 30, 31) sts from the shoulder down the side, this will be your opening for the sleeve.
Begin sewing from above the ribbing (if you want to leave an opening), you can also start sewing from the bottom, on the front piece and sew all the way to the sm. I started my seam 15 sts up, threading the tail on the inside up until the 15 sts where I started to sew.

F. Fold the front over the back. Place a sm 20 (21, 22, 24, 27) (28, 29, 30, 31) sts from the shoulder down the side. Begin sewing from above the ribbing.
Neckline
Try on your sweater to see the width of the neckline. If it feels too wide, then we can close it up a bit here when making the edging around the neckline.
Edging
Row 1: Attach your yarn on one of the shoulders of the neckline (rs out) with a sl knot. Sl st around the neckline so that you’ve sl st on both sides.
If the neckline is too wide, you can slip stitch it together. You do that by attaching your yarn in the middle of the V with a slip knot. Go through the stitch on the right side with your hook and then the matching stitch on the left side with the hook, yarn over and pull up a loop, pull through the loop on the hook. Repeat for as many stitches you want to close.
Continue to slip stitch on one of the sides until you reach the v on the other side (stop x amount of stitches before the V. Where x is the number of stitches you closed on the other side). Fasten off.
Attach your yarn in the middle of the V with a slip knot. Go through the stitch on the right side with your hook and then the matching st on the left side with the hook, yarn over and pull up a loop, pull through the loop on the hook. Repeat for as many stitches you want to close. Continue to slip stitch on one if the sides until you reach the slip stitches on the other side. Fasten off.
Edging on the side openings
If you left openings on the side, then we make an edging here. Attach your yarn in the bottom of the opening with rs facing out (Picture G). Sl st around the opening until you reach the end of the other side of the opening. Repeat on the other side.


G. Attach your yarn in the bottom of the opening. Sl st around the opening.
Sleeves
Attach your yarn in the middle of the side seam with a slip knot, right side facing out. Ch 1. (Picture H)
H. Attach your yarn in the middle of the side seam with a slip knot, right side facing out. Ch 1.
Row 1: Crochet 41 (43, 45, 49, 54) (56, 59, 61, 62) hdc-BLO around the sleeve opening. One st in every st, if you have an uneven amount of sts you also make a st in the (body) side seam. Join to the first st of the row with a sl st. Ch 1. Turn.

Row 2: Hdc-BLO in every st around. Join to the first st with a sl st. Ch 1. Turn.
Row 3-25*: Repeat row 2.
*make more or less rows depending on your preferred sleeve length. The sleeve will be around 2.5” ( 8 cm) longer with the rest of the rows and ribbing.
Row 26: *Hdc, hdc2tog* repeat around (you do not have to end on a full repeat). Join to the first st with a sl st. Ch 1. Turn.
Row 27: *Hdc, hdc, hdc2tog* repeat around (you do not have to end on a full repeat). Join to the first st with a sl st. After joining with a sl st - ch 9 and continue with the ribbing (Picture I).
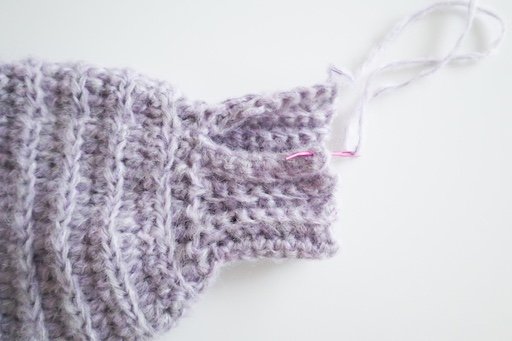
Ribbing of the sleeve
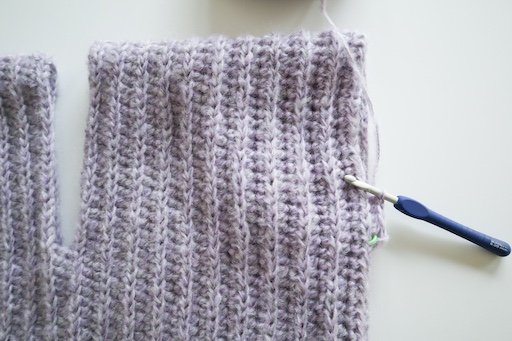
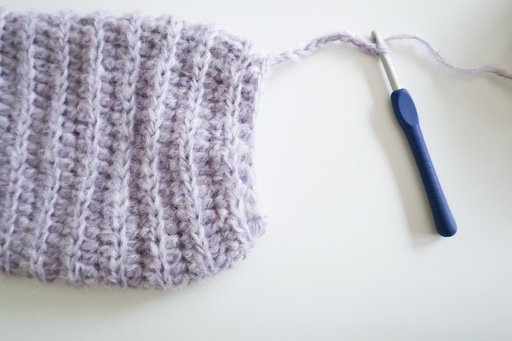
Row 1: Sc in the back bump of the second chain from the hook. Sc across row (Picture J). Connect to the sleeve by sl st in next 2 sts of the sleeve (Picture K). Ch 1. Turn. (8 sts)
Row 2: Skip the 2 sl st (Picture L). Sc-BLO across row (Picture M). Ch 1. Turn. (8 sts)
Row 3: Sc-BLO across row. Sl st in next 2 sts of the sleeve. Ch 1. Turn.
Continue repeating row 2-3 all the way around the sleeve. Sew or sl st the sides of the ribbing together where they meet (Picture N).
Repeat for the other sleeve.
Block to correct measurements and weave in ends.

The crochet October Sweater is a ribbed sweater with plenty of positive ease making it really comfortable to wear. It is an easy and due to larger hook size used it is a fast make.
The pattern includes a full video tutorial on YouTube that you can find here:
Sizing
This pattern is written in nine sizes: XS (S, M, L, XL) (2X, 3X, 4X, 5X).
Yarn
Diablo Multi from Hobbii Yarn (40% Acrylic, 30% Mohair, 30% Polyamide. 98 yds (90 m) per 50g-skein) or other (heavier) Aran / Worsted / 10 ply / 9 wpi / 4-weight yarn as long as you meet gauge.
Please note! That Diablo Multi is classified as a bulky (5) weight yarn. But comparing the gauge it matches more a heavier aran/worsted weight yarn. But if you want to use a bulky /5 -weight yarn that might work nice as well. You can also use an aran weight yarn + a strand of mohair.
Yarn usage
8 (9, 10, 10, 11) (12, 13, 14, 15) skeins of Diablo Multi. Sample made in color 20.
Crochet hook size
J-10 (6.0 mm)
Skill level
Easy
Pattern is available in English (US terminology).
COPYRIGHT
The pattern and photographs of this design are the property of Coffee & Crocheting. This pattern and design are subject to copyright, and are for personal, non-commercial use only. You may not distribute or sell this pattern without consent
Happy Making!
COPYRIGHT
The pattern and photographs of this design are the property of Coffee & Crocheting. This pattern and design are subject to copyright, and are for personal, non-commercial use only. You may not distribute or sell this pattern without consent


Follow on me on Instagram @coffeeandcrocheting