The Unfinished Project Bag
Looking for the perfect project bag to hold your knit or crochet project while working on it? This is a review telling you about the pros and cons of the Unfinished Project Bag from GEO-METRY. Grab a cuppa and let’s dig in.
I stumbled upon this beautiful bag online. It looked like the perfect project bag to hold your next crochet or knit project. And what was even more interesting was that you needed to complete it yourself. I’ve always loved the idea of ready kits to try out a new craft or hobby and this seemed like the perfect kit to do so. I mean I would get a beautiful bag that can be used for my current craft as the end result! Realising that the company, GEO-METRY, was also based in Scandinavia I had to contact them. I got in contact with Georgiana from GEO-METRY who was very friendly and helpful and kindly sent me a bag to try out.
You can see the video version of the project as a story highlight on my instagram.
The bag
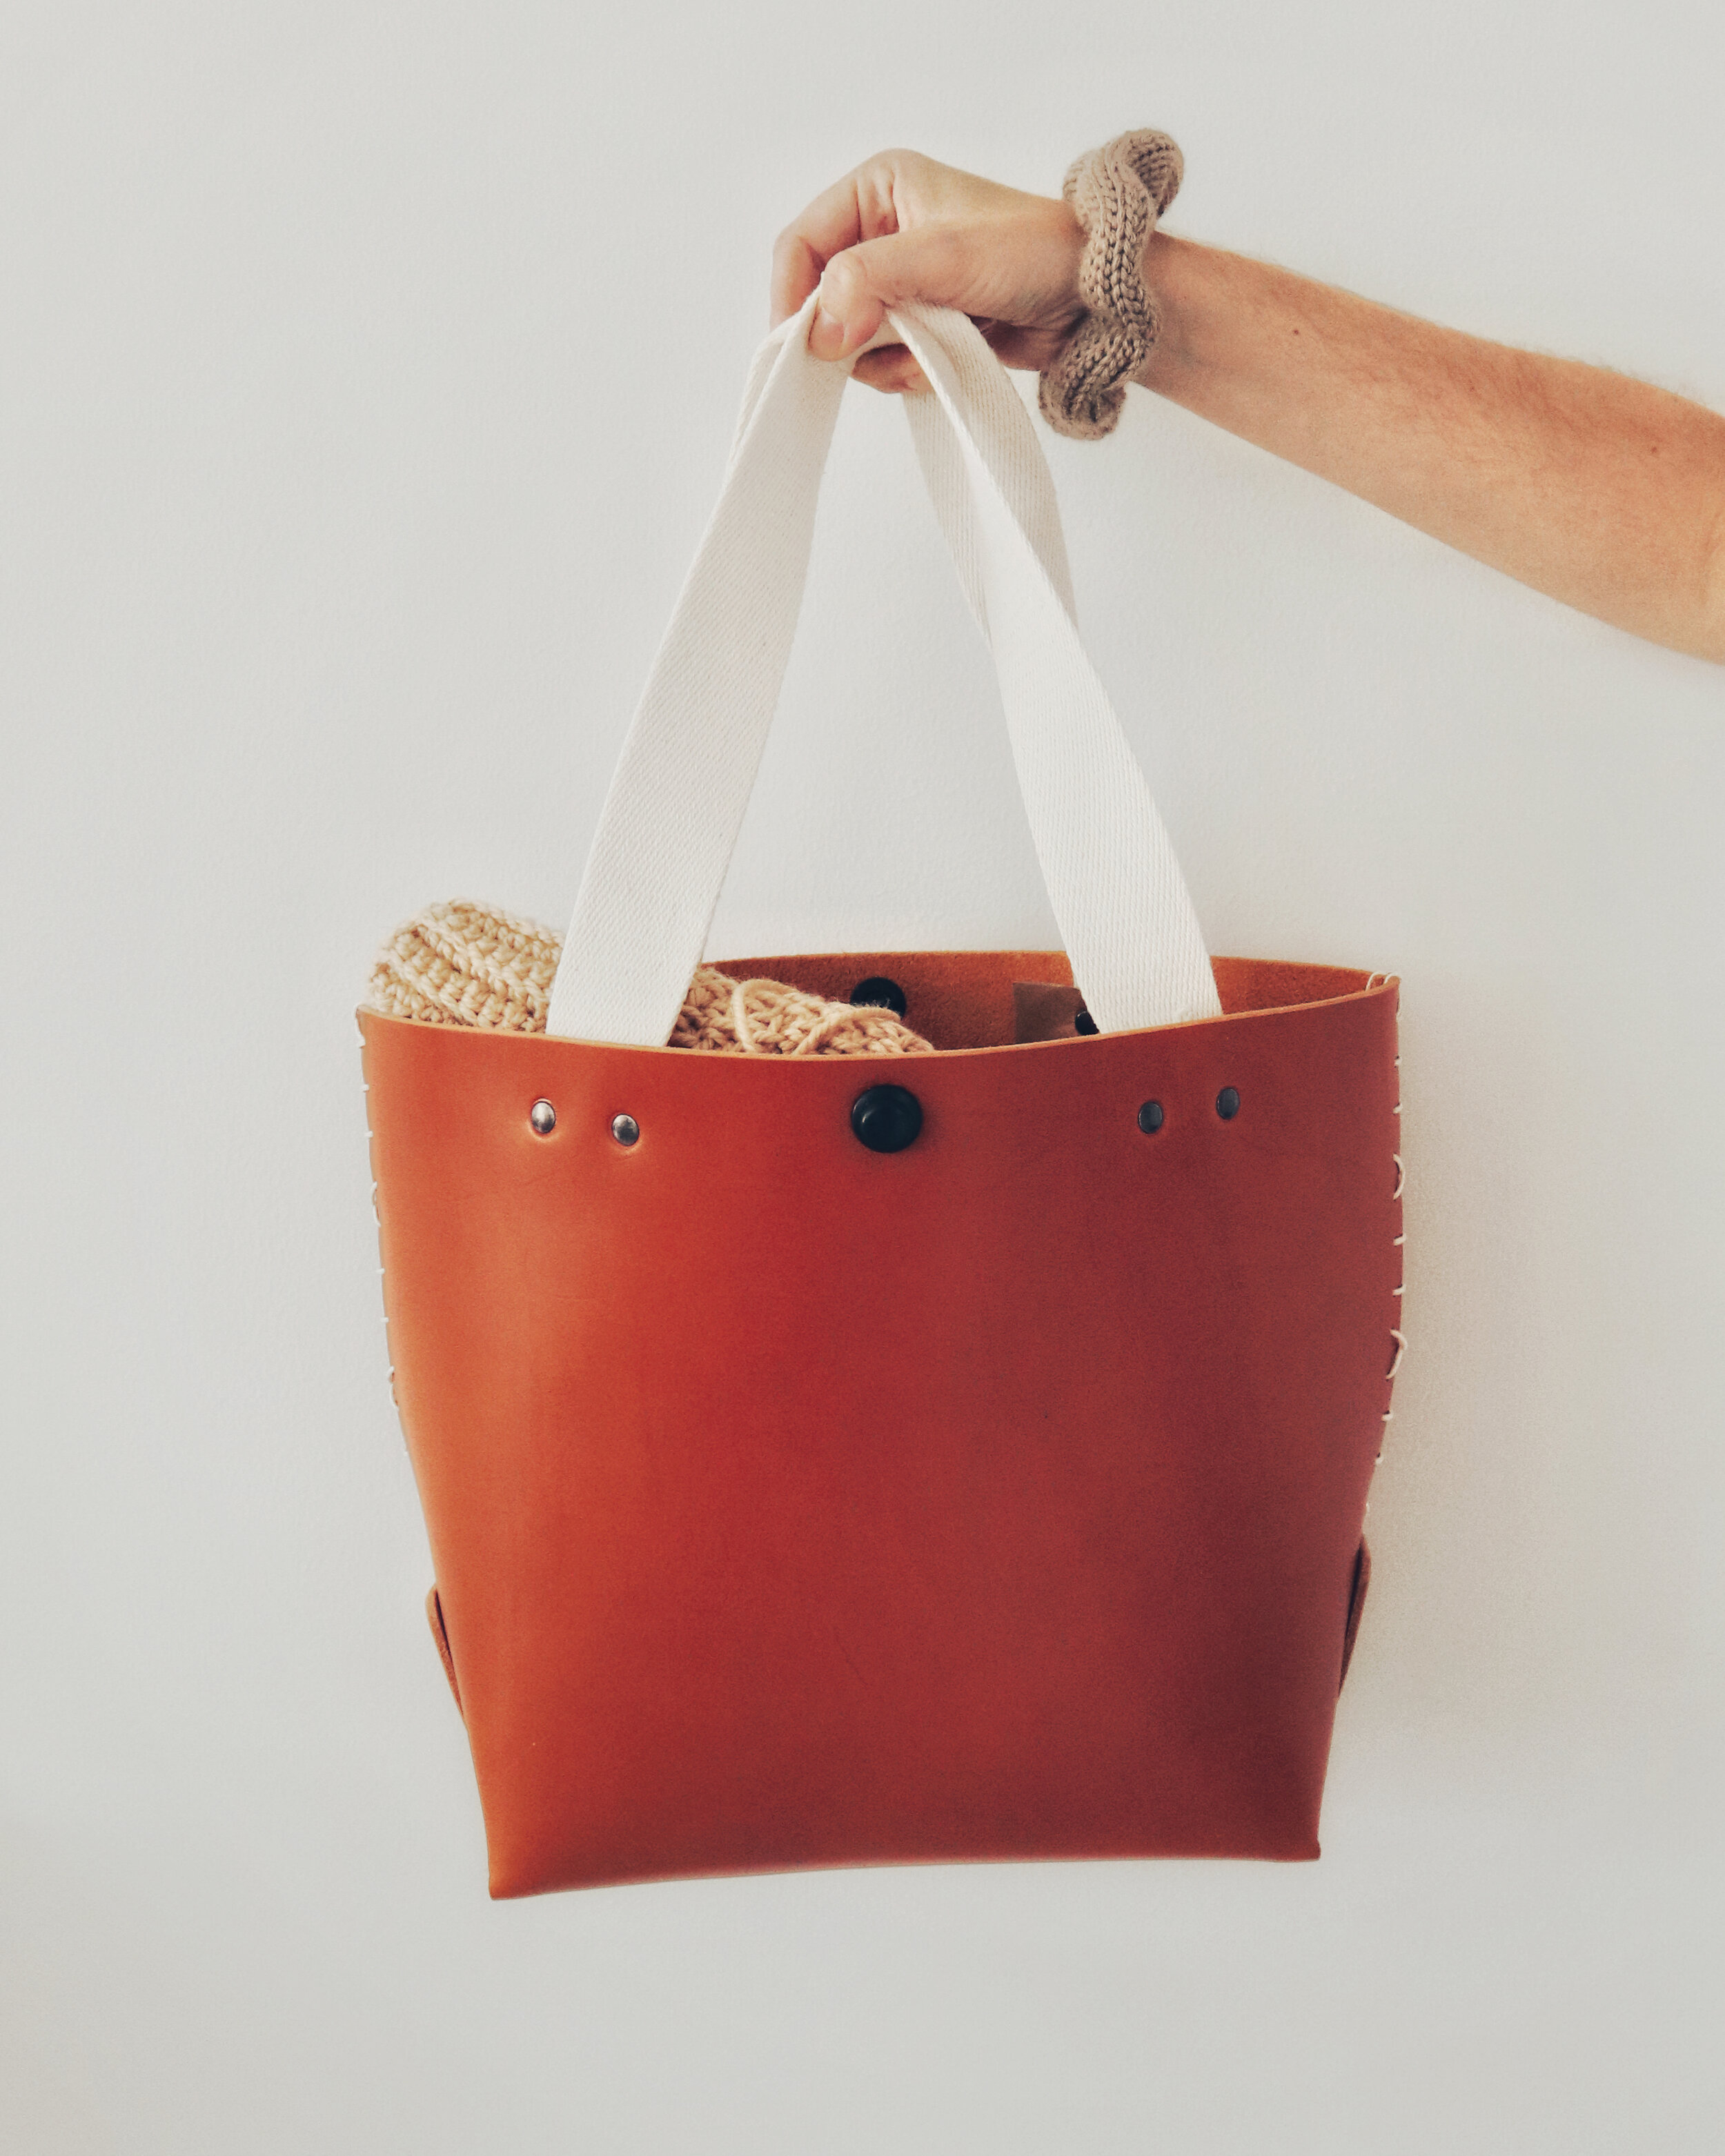
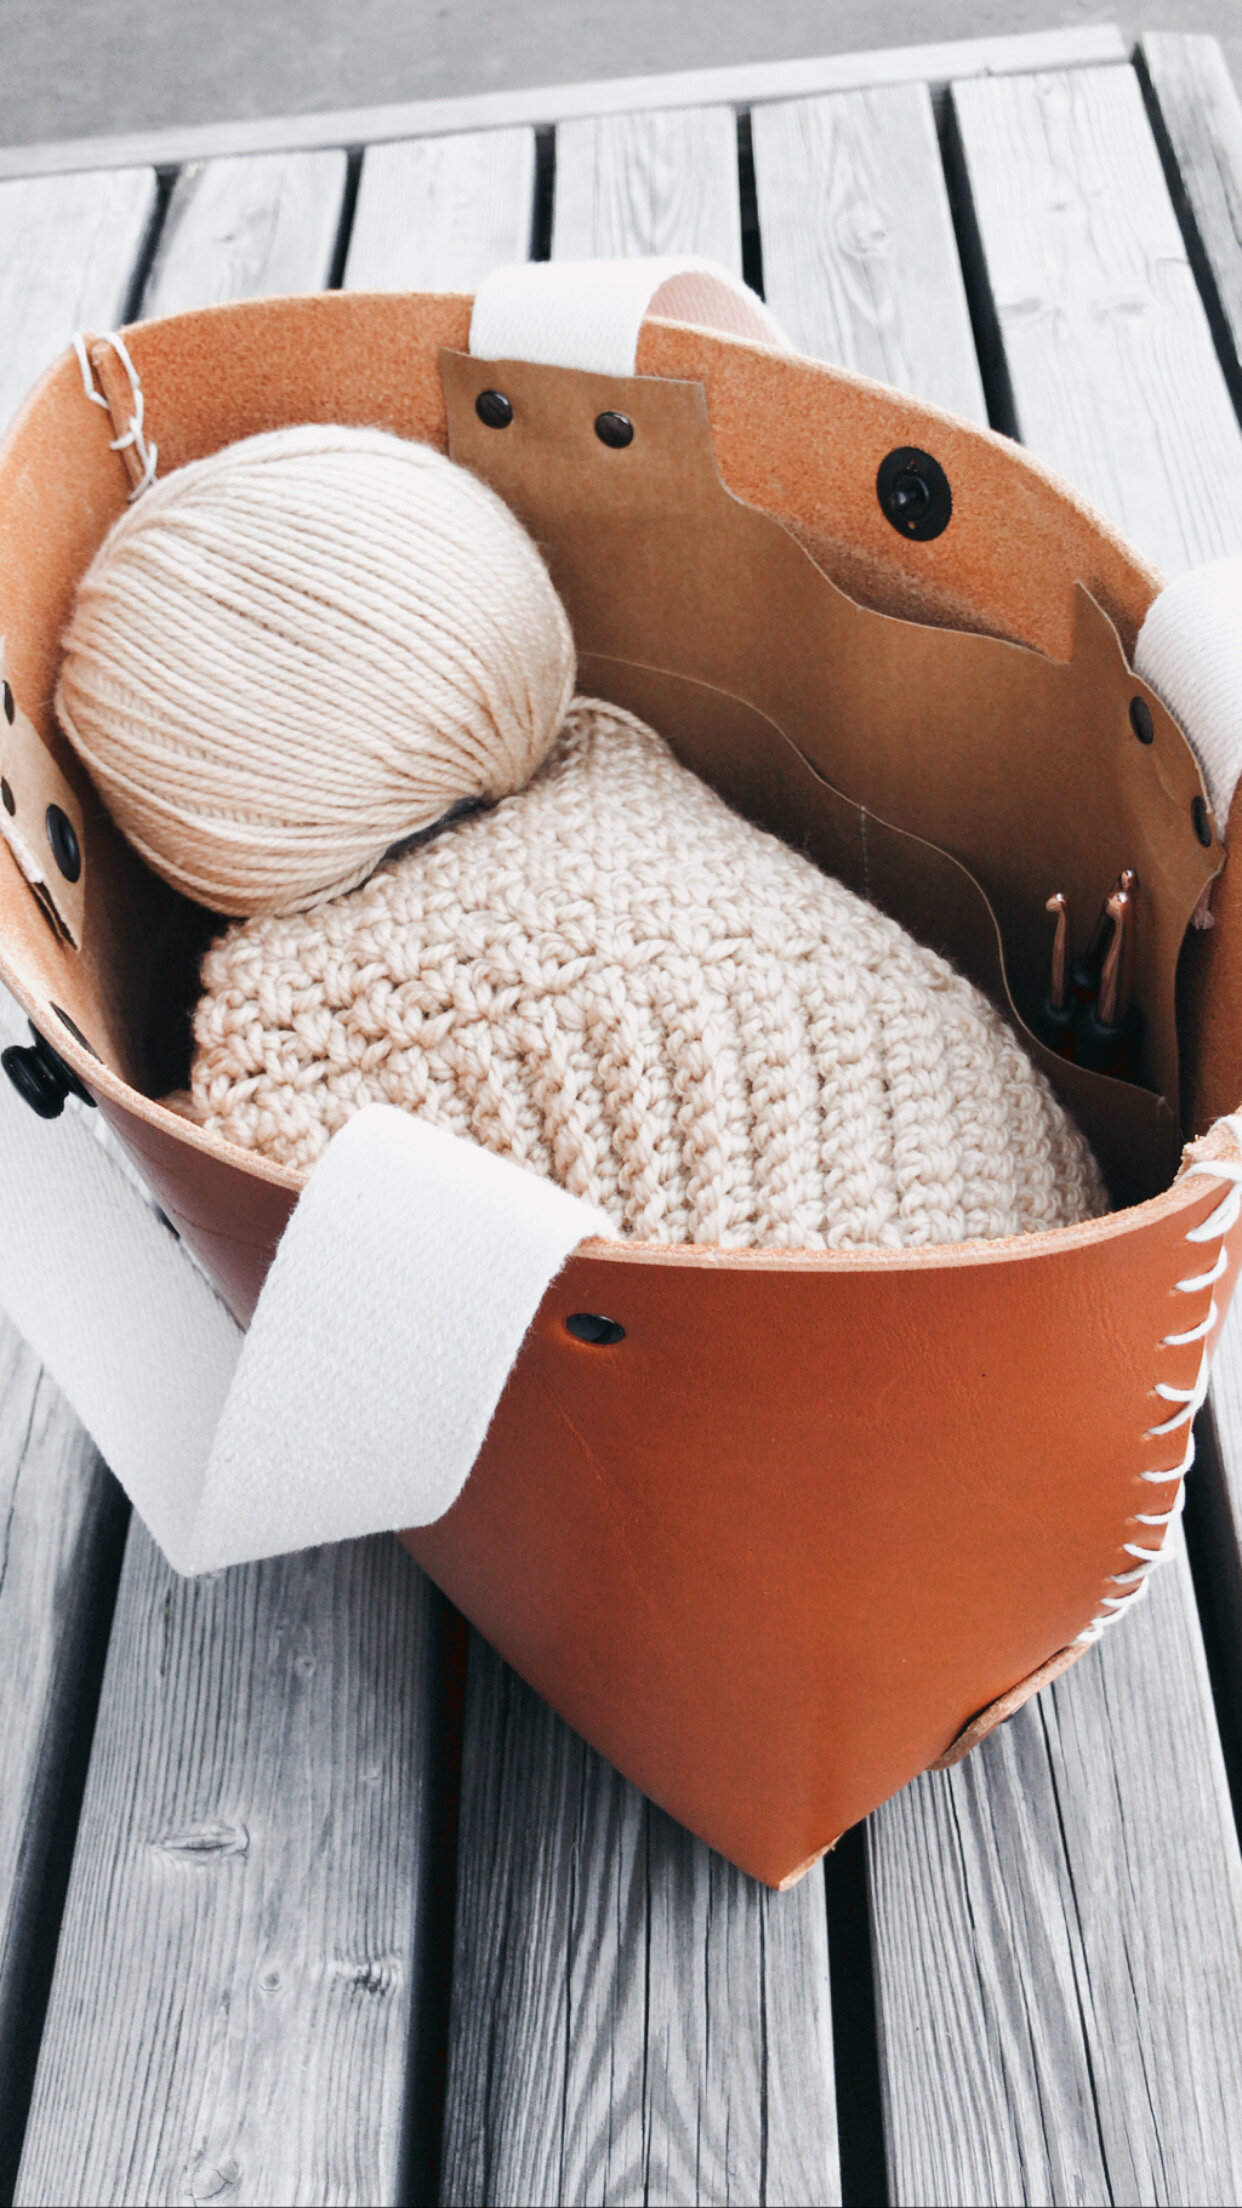
Let me tell you a bit about the bag before we get into finishing up the bag. It is made in one single piece of leather, 100% European vegetable tanned. It has an open top with a LOXX snap-fastening closure, an inner pocket and a spacious main compartment. It is 35 x 26.5 x 15 cm and the handle drop is 22 cm. The bag is made-to-order meaning that they only produce the item on order by hand in Denmark. You can order it in three different colors tan, cognac or black. Mine is in the cognac color.


Story
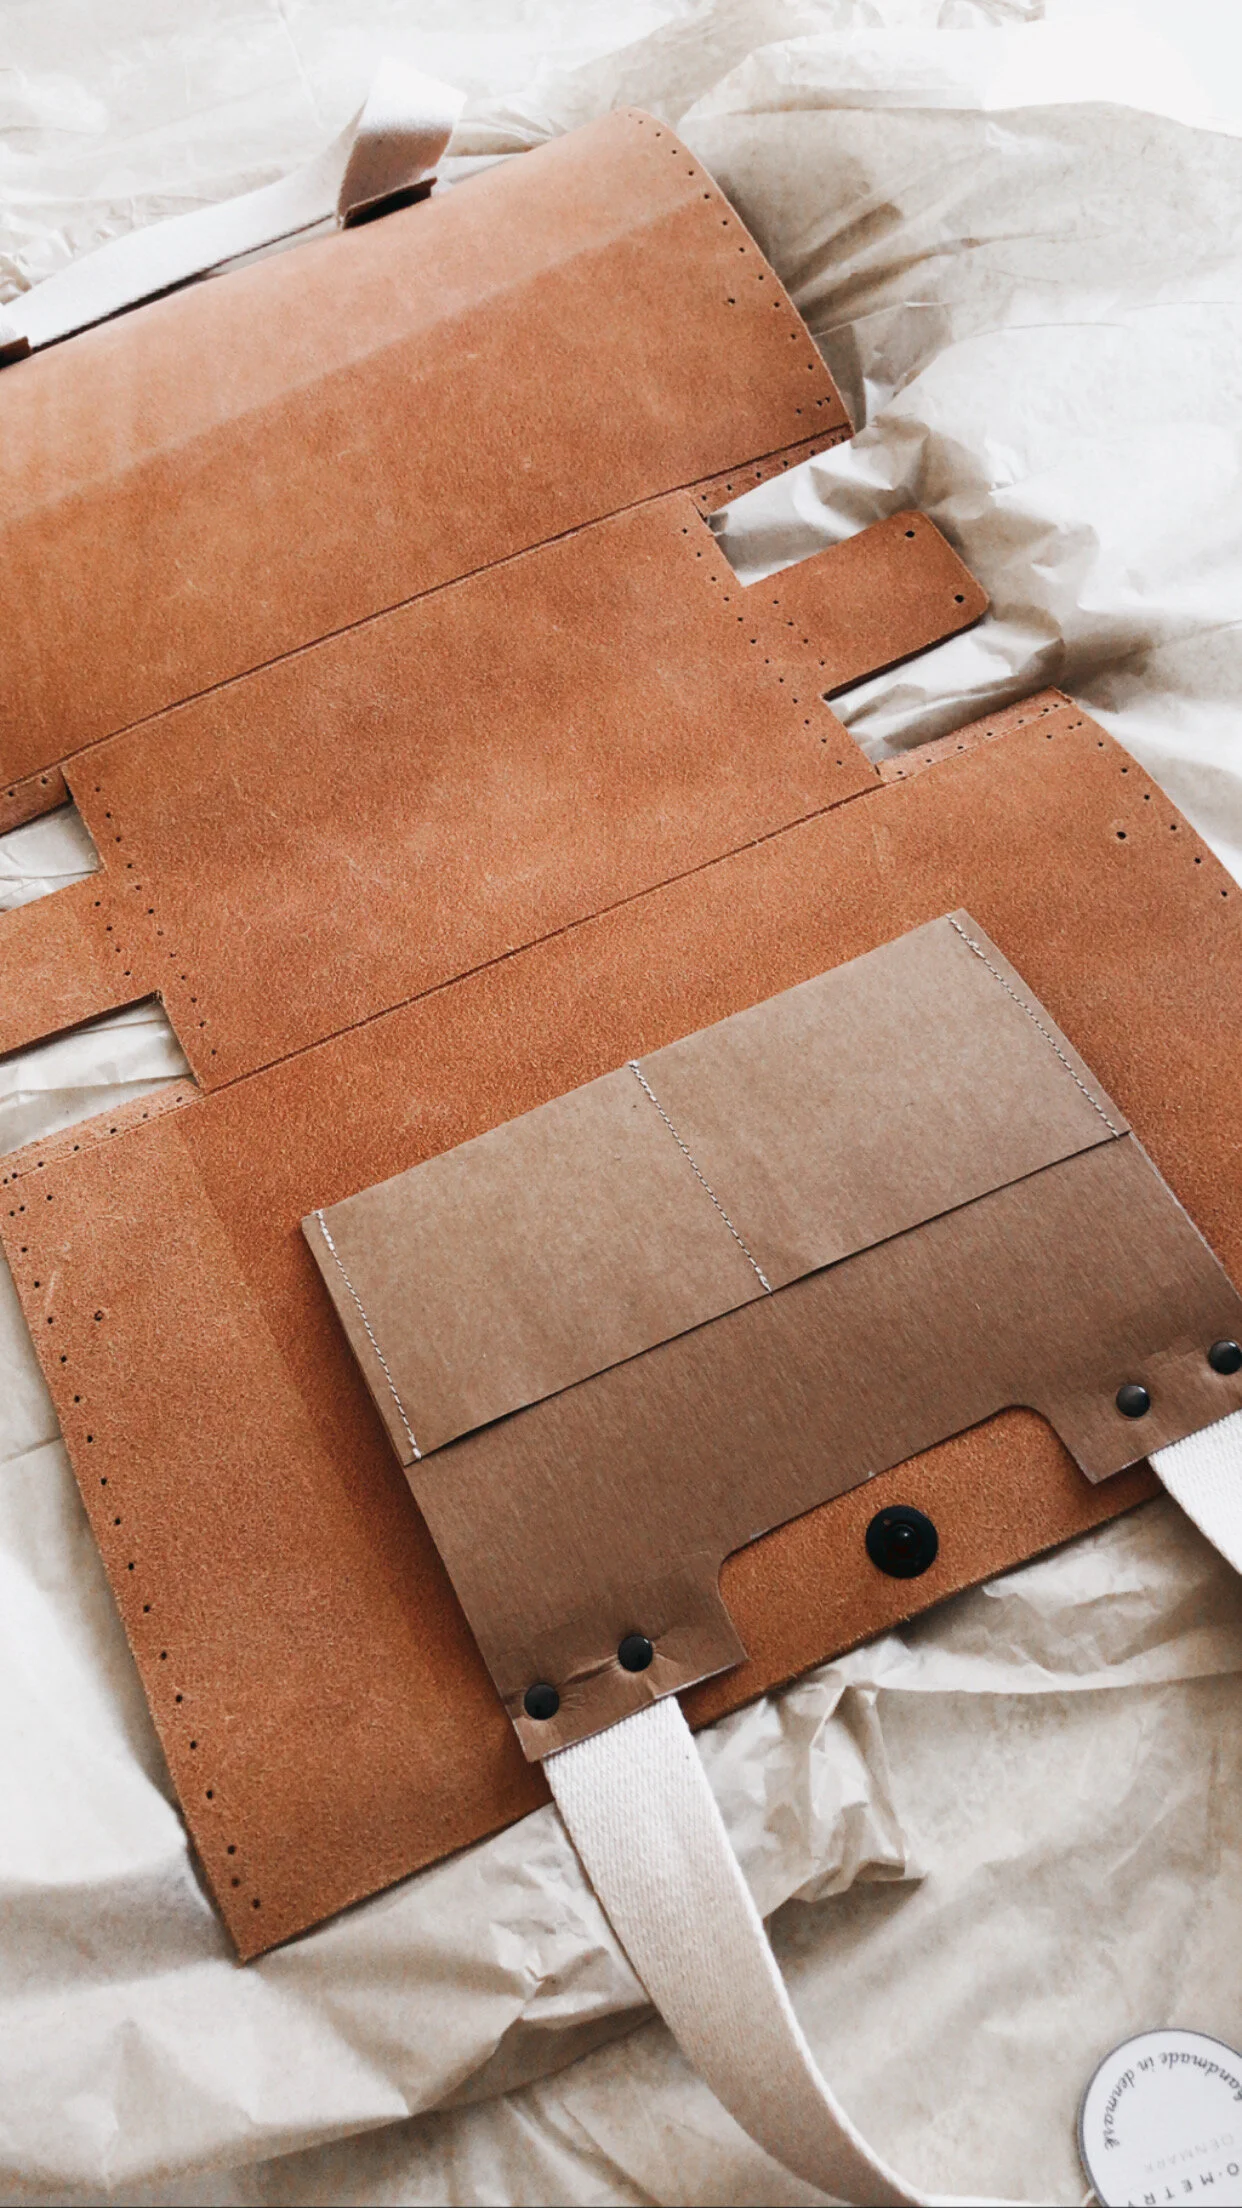
It was a Saturday afternoon when I decided to start my project. Opening the package I found a cute handwritten note from Georgiana. The package included instructions to complete the bag and the necessary tools and accessories like cotton cord and screw rivets. The only thing you needed to have at home was scissors and a crossheaded screwdriver. Born in the land of IKEA and raised putting together flat-packs I organised all the parts on the table and opened the manual.
Threading the needle
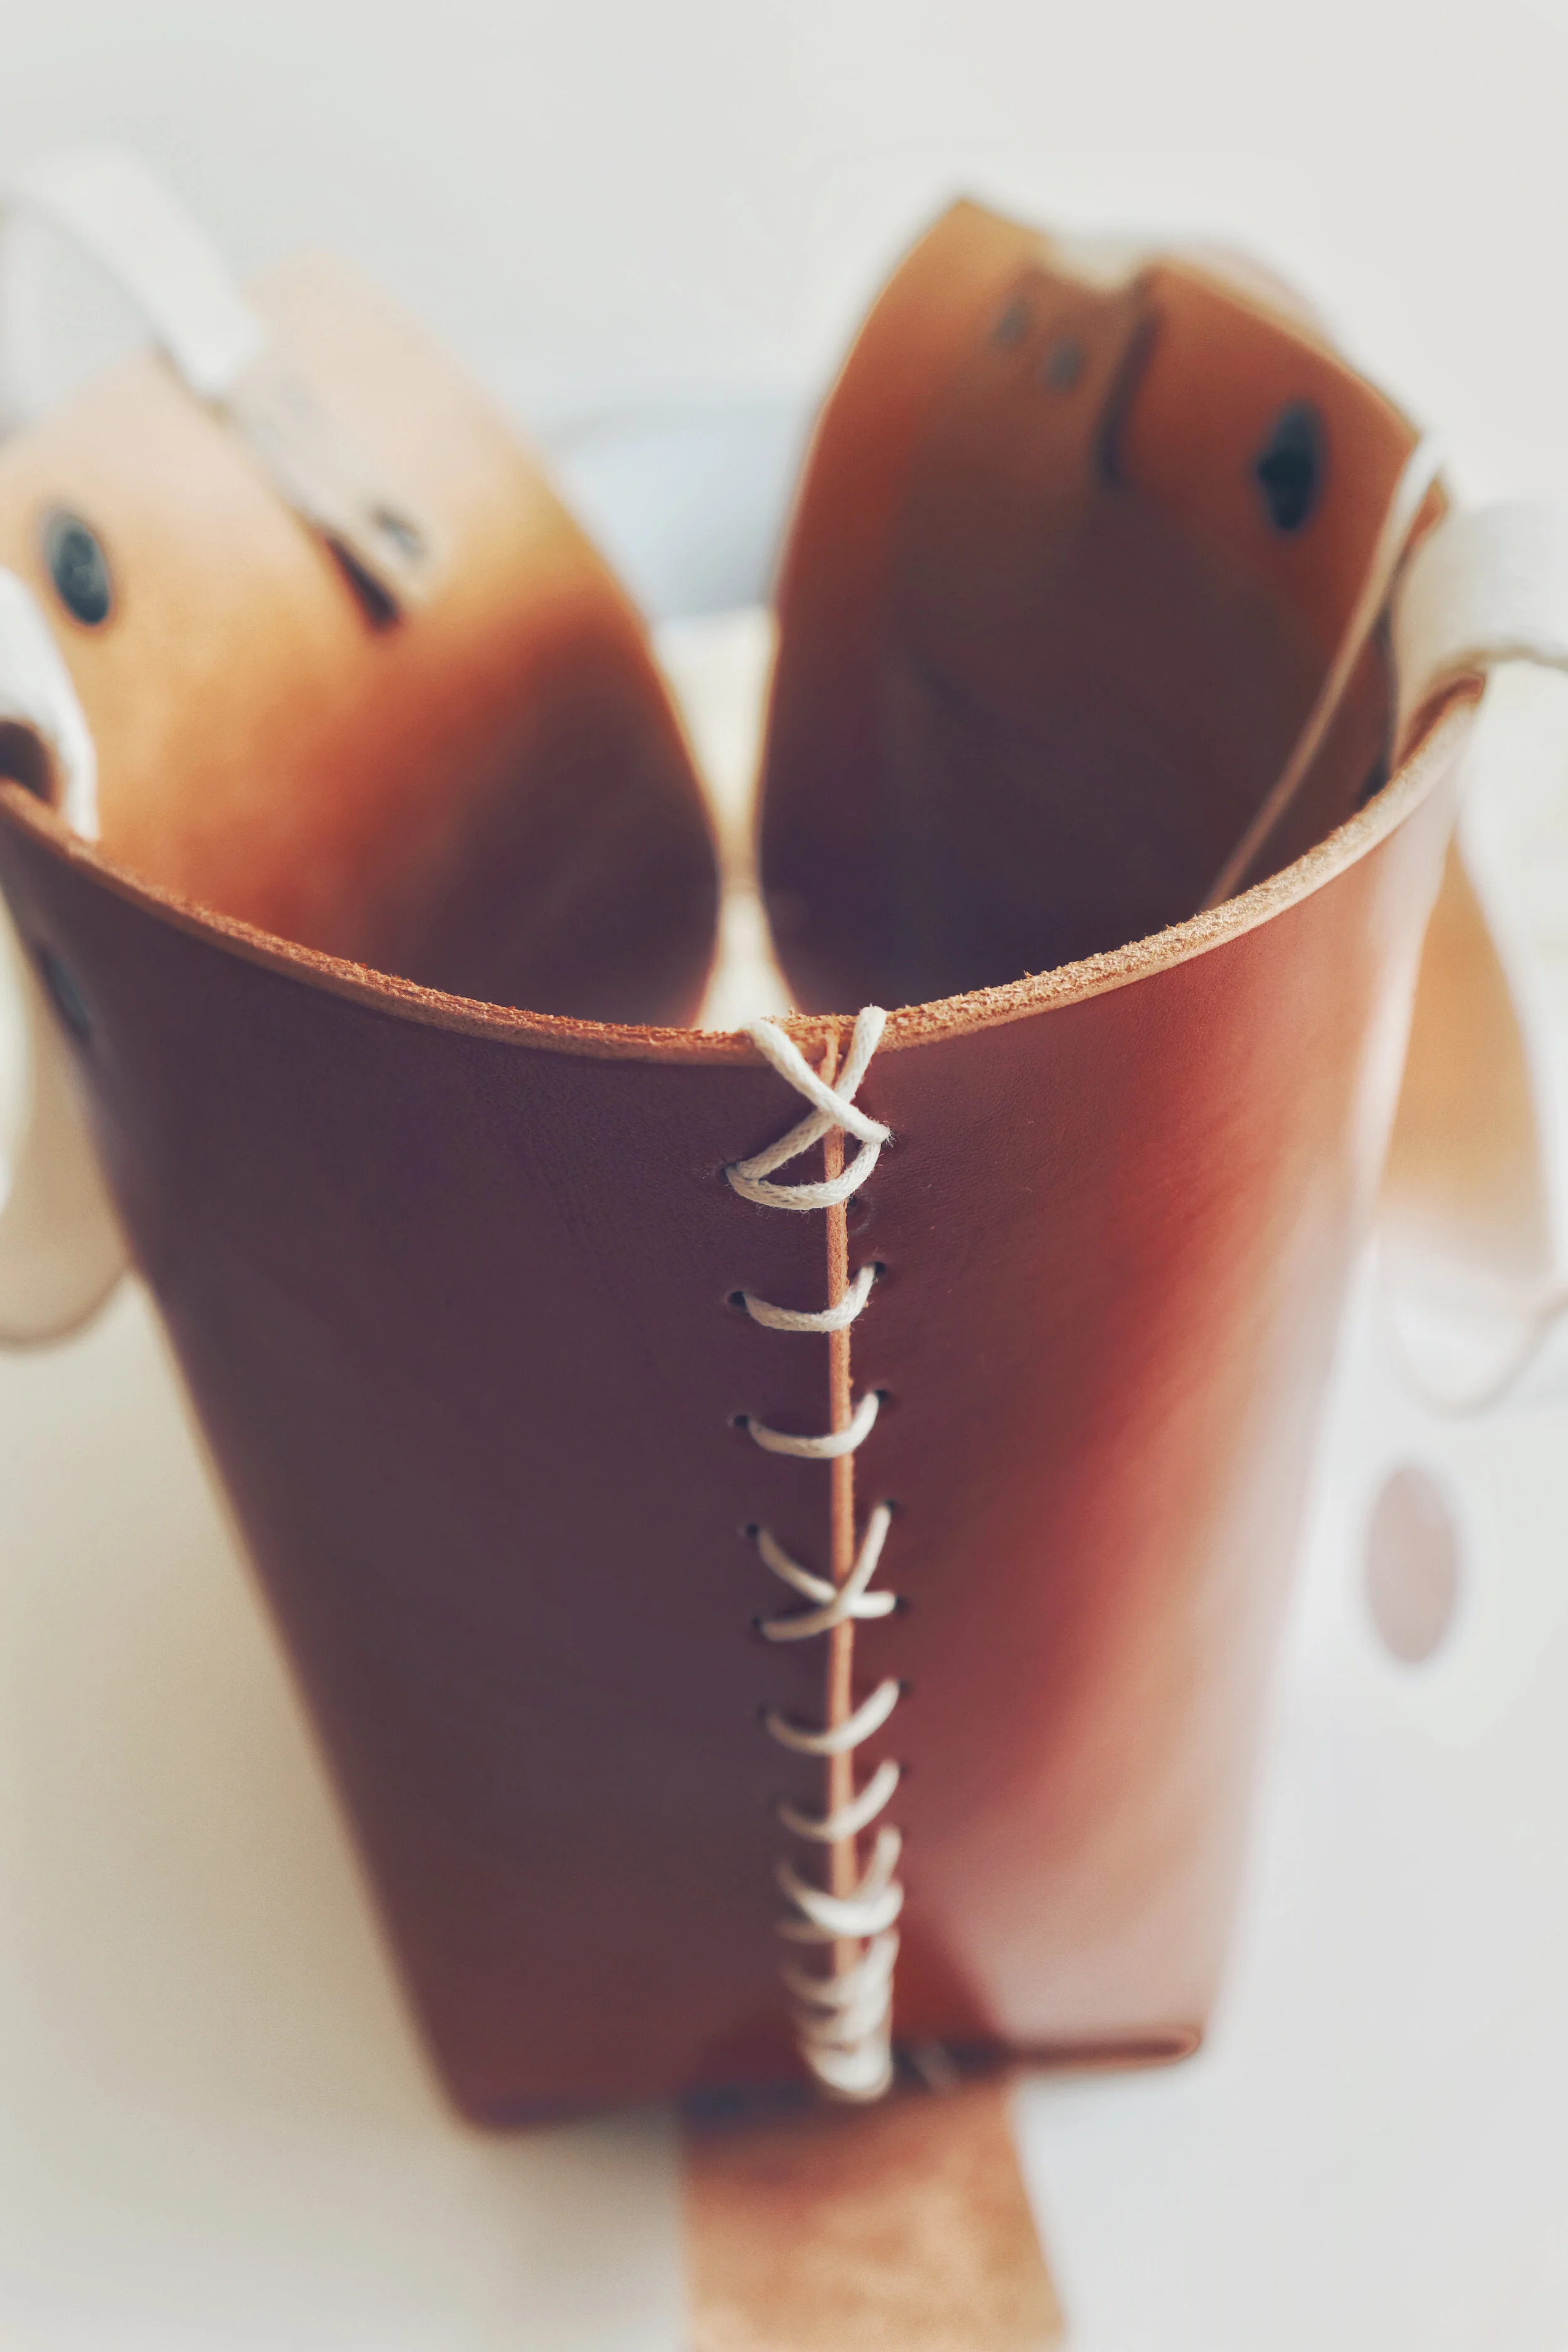
After reading through the manual and getting a view on all the steps I got started. First step: thread the needle with the cord marked with number 1. Easy-peasy I thought. Turns out it wasn’t. The needle was a round perma lok needle where you need to twist in the cotton cord in the small round opening in the end of the needle. Easy to understand, harder to do. It took me 45 minutes the get the cord inside the needle. It scared me a bit thinking I needed to repeat it five more times since I had a total of 6 cotton cords. Happy that I finally got the needle on the cord I started to sew the sides.
Strong hands needed
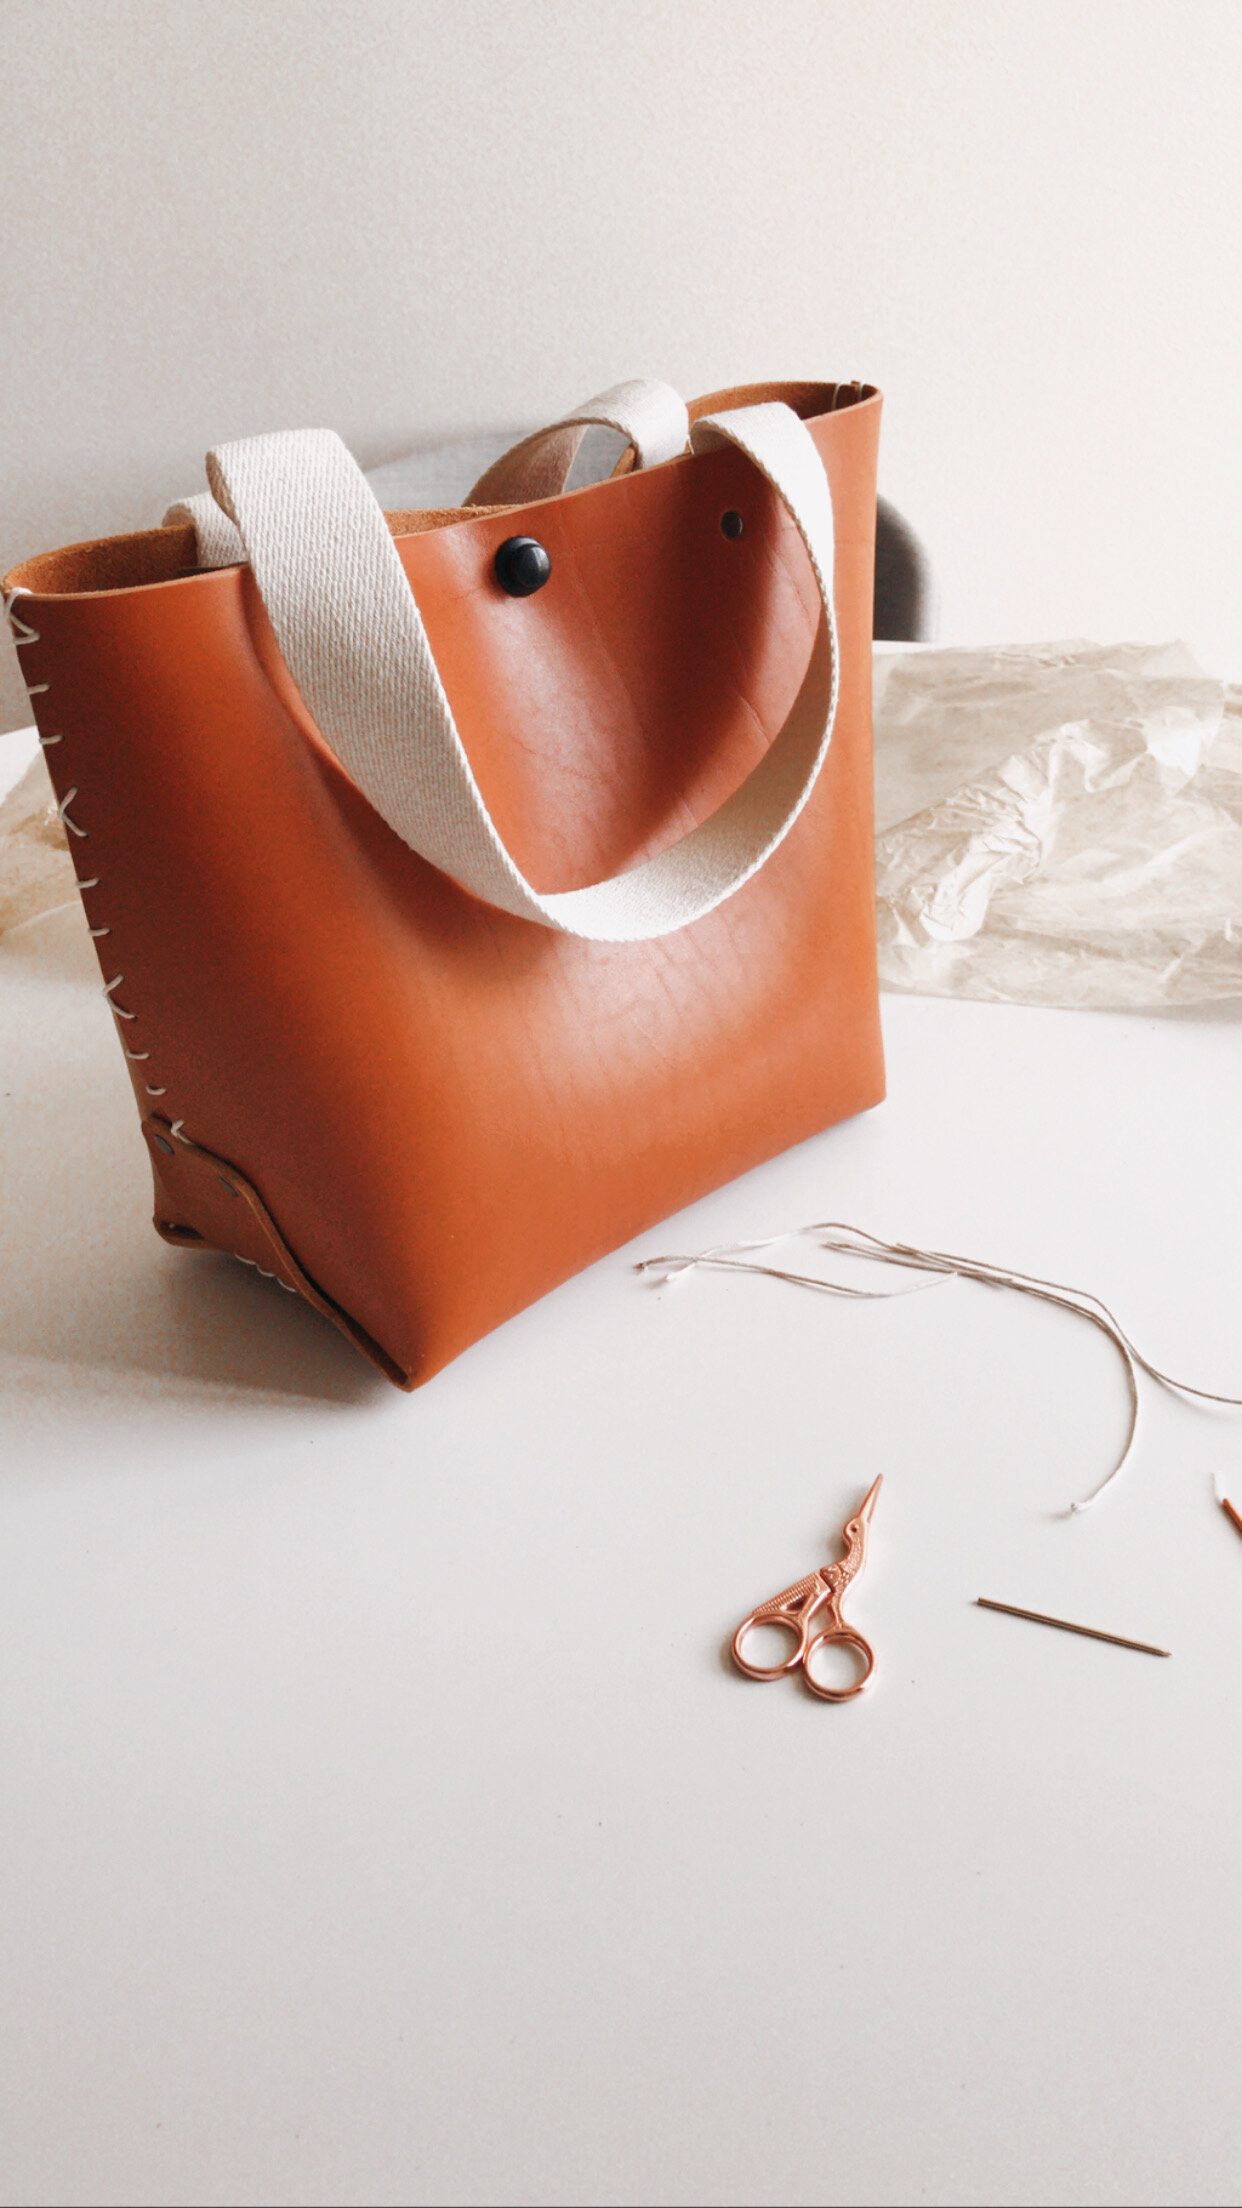
In their difficulty rating GEO-METRY explains that you need strong hands and a little bit of patience to complete the bag. And I would say it sums it up very well. I do not have very strong hands and crocheting with thin yarns make me used to handle my projects with care. It was basically the opposite I needed now. To fold the leather and keep the parts together and sew at the same time you needed really strong hands. Especially for the first side. I was happy I had my workout clothes on still cause it was like a workout for me. I got all sweaty and I loved it! It was so fun forcing the pieces together pulling the cord tight and watching the bag form in front of your eyes.
Instructions
The instructions came in a folder that was black and white making it a bit tricky at times to see how you should proceed. But they had completed the photos with drawings making it more understandable. I think additional video instructions would be a nice extra touch, both how to thread a perma lok needle and how to sew the sides, at least for the first stitch and securing the ends.
Add a touch of personality to your bag
The instructions leaves room to close up the sides in the way you want and I decided to make some of my stitches in another way to give a personal touch to my bag. After the first few stitches the side went quite fast to finish up. The trickiest part was to hold it tight together and sew at the same time. After completing the side you still had the bottom closures left. That meant threading the needle 2 more times, something I had got a bit scared of after my first try. Turns out I had got it now and it wasn’t any trouble at all. My favourite part of finishing up the side was to add the screw rivets. It was fun using a screwdriver to add nice final details to the bag.
Other side
Repeating the same steps for the other side was a breeze. Now the bag kept together nicely and you didn’t need as much force to keep it together. The second side took me 15 minutes to complete compared to 90 minutes on the first side. I was in no way hurrying through, sipping a cold beverage and taking a lot of photos and videos. The estimate of 1-2 hours to complete given by GEO-METRY was a good estimate.
Summary
Overall summary of the project: it was a fun and different project to complete. It had its challenging parts and you do need strong hands, maybe even a project partner helping you to hold the bag closed. That could also make it a nice project to do with a friend. I loved the process of completing it and think it is fun that it takes you a bit out of your comfort zone.
The finished bag is perfect for carrying your projects. The inner pocket can easily hold a couple of crochet hooks and scissors and I could fit 3-4 50g skeins of yarn as well as half of a work in progress cardigan and bring a long to the sea. I think the Cocoon yarn holder from the same brand would be a nice addition to hang from your bag while working on your latest project.

I know this will be a bag I will use a lot and it makes it extra fun to say that I completed it myself!
Additional Information:
The unfinished project bag is made to order. GEO-METRY ships within Europe and to US. They also have resellers that sell some of their already finished products like the Cocoon and planning to expand their offering. The resellers are available in Denmark, Netherlands, Germany, UK, Australia, US (find all places here). Go and have a look and support a small business!
Check out the video version of the project as a story highlight on my instagram.

Voting open until 30th of September 2020